Ubiquiti UVC‑G3 Flex

£41.48

Get clear and reliable surveillance footage with the Ubiquiti UVC-G3 Flex camera, perfect for both indoor and outdoor monitoring.

SKU: 9330232 Category:

Description

Ubiquiti UVC‑G3 Flex Surveillance Camera is an innovative device that has revolutionized the security industry. This compact camera may look simple, but don’t be fooled by its size. It packs a punch in terms of features and performance, making it an excellent choice for anyone looking to upgrade their surveillance system.

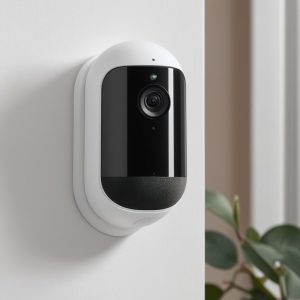
This camera is designed to be a flexible and versatile option for indoor and outdoor surveillance. With its weather-resistant enclosure and compact size, it can be mounted almost anywhere, making it an ideal choice for homes, businesses, and other public areas where security is a top priority.

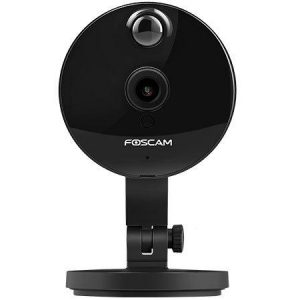
One of the main features of this camera is its high resolution video. The Ubiquiti UVC‑G3 Flex Surveillance Camera captures crisp, clear 1080p HD video, allowing you to see every detail in your footage. Additionally, it features a wide-angle lens with a 100-degree field of view, giving you a broader view of the area you’re watching.

Another standout feature is the camera’s innovative design. With its magnetic base, the Ubiquiti UVC‑G3 Flex Surveillance Camera can be quickly and easily mounted in a variety of locations. Plus, with its flexible body, it can be adjusted to capture the perfect angle, ensuring that you don’t miss a thing.

The Ubiquiti UVC‑G3 Flex Surveillance Camera also features advanced motion detection capabilities. It can be configured to trigger alerts when motion is detected in specific areas, making it an excellent choice for monitoring entrances, exits, and other high-traffic areas.

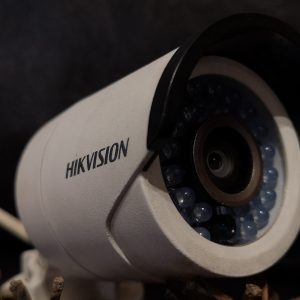
Another feature that makes this camera stand out is its Night Vision mode. With infrared LEDs, it can capture clear video in low-light conditions, allowing you to monitor your property even when it’s dark outside.

Lastly, the Ubiquiti UVC‑G3 Flex Surveillance Camera comes with an intuitive mobile app, making it easy and convenient to view your footage from anywhere. The app allows you to access your camera’s live feed or playback recorded footage, as well as adjust camera settings and configure alerts.

In conclusion, the Ubiquiti UVC‑G3 Flex Surveillance Camera is an excellent choice for those looking to upgrade their security system. With its high-resolution video, innovative design, advanced motion detection, Night Vision mode, and user-friendly mobile app, it has everything you need to keep your property safe and secure.

Additional information

Product name

Features

Height

Width

Depth

Weight

Reviews

There are no reviews yet.

Be the first to review “Ubiquiti UVC‑G3 Flex”

Your email address will not be published. Required fields are marked *

Frequently Asked Questions:

How do I properly configure and install the Ubiquiti UVC-G3 Flex camera for use in a surveillance system?

Here's an overview of how to configure and install the Ubiquiti UVC-G3 Flex camera for use in a surveillance system:

1. Unpack the UVC-G3 Flex camera from its packaging and ensure that all necessary components are present, including the camera itself, mounting brackets, power supply, Ethernet cable, and any other accessories included with the product. Locate a suitable location for the camera, ensuring that it has a clear line of sight to cover the desired surveillance area. The UVC-G3 Flex camera is designed to be highly flexible, allowing you to position it in almost any orientation or configuration to suit your specific needs. Mount the camera using the included brackets and hardware. Be sure to tighten all screws and bolts securely to prevent the camera from shifting or becoming dislodged over time. Connect the camera's power supply to a nearby electrical outlet, ensuring that it is connected securely and properly grounded as needed. The UVC-G3 Flex camera supports both 12 VDC and 24 VAC power sources, depending on your specific setup requirements. Use an Ethernet cable to connect the camera directly to your network switch or router, ensuring that it is connected securely and properly grounded as needed. Be sure to use a high-quality, CAT5e or higher Ethernet cable for best results. Power on the UVC-G3 Flex camera by pressing and holding the reset button on the rear of the device until the LED indicator light turns green. This will clear any existing configuration settings and allow you to begin configuring the camera using your preferred network management tool or web browser interface. Access the camera's configuration interface by opening a web browser on a nearby computer or mobile device and navigating to the default IP address (192. You may need to adjust these settings based on your specific network configuration requirements. Follow the on-screen prompts and instructions to configure the UVC-G3 Flex camera according to your desired surveillance system requirements, including settings for image resolution, compression format, frame rate, motion detection, and other advanced features as needed. Be sure to test and verify the camera's performance regularly to ensure that it continues to meet your ongoing surveillance needs over time. Once you have finished configuring the UVC-G3 Flex camera, be sure to securely mount it in place using the included brackets and hardware, taking care to avoid any potential sources of interference or distortion that could impact image quality or performance over time. Be sure to test and verify the camera's functionality regularly to ensure that it continues to meet your ongoing surveillance needs and requirements over time. Finally, be sure to follow all relevant safety guidelines and procedures when installing and configuring the UVC-G3 Flex camera, taking care to avoid any potential sources of electrical shock, fire hazards, or other safety concerns that could impact both your own personal safety as well as the ongoing reliability and performance of the device itself.

How do I properly set up and configure my new Ubiquiti UVC-G3 Flex camera for use in a home security system?

Setting up and configuring your new Ubiquiti UVC-G3 Flex camera for use in a home security system involves the following steps:

1. Unpack the camera: Remove the camera from its packaging and ensure all components are present, such as the mounting bracket, power adapter, and Ethernet cable. Mount the camera: Choose a suitable location to mount the camera, preferably with an unobstructed view of the area you want to monitor. Attach the camera to the mounting bracket using the provided screws and secure it to a wall or ceiling. Connect power: Connect one end of the power adapter to the camera's power input port and the other end to a nearby power outlet. The camera's status LED should light up, indicating that it has received power. Connect network: Use an Ethernet cable to connect the camera to your home network router. Make sure you use a reliable and secure network connection for your camera. Access camera settings: Open a web browser on a computer or mobile device connected to the same network as the camera. Type "http://ubnt. Flex" from the options that appear. The camera's configuration page will load, prompting you to log in with the default username and password (admin/admin). Configure basic settings: From the camera's configuration page, navigate to the "Basic Setup" tab. Here, you can configure some essential settings for your camera, such as its name, time zone, and network settings. Make sure to save any changes you make. Set up storage: To store footage captured by the camera, you may want to set up a network-attached storage (NAS) device or cloud storage solution compatible with Ubiquiti's UniFi Video system. Follow the instructions provided by your chosen storage option to connect it to the camera and enable recording. Test the camera: Once you have configured the camera, test it by viewing its live stream using a web browser, mobile app (such as UniFi Protect), or other compatible monitoring software. Make sure that the video quality is satisfactory and that any motion detection features are working correctly. Secure your network: To ensure the security of your camera and home network, follow best practices such as using a strong password, regularly updating firmware, and limiting access to your network via MAC address filtering or VLANs. Troubleshoot any issues: If you encounter any problems during setup or operation, consult Ubiquiti's online documentation and support resources for assistance. Additionally, try resetting the camera to its factory settings by pressing and holding the reset button on the back of the device for at least 5 seconds.

"How do I configure the motion detection settings on my Ubiquiti UVC-G3 Flex camera?"

To configure motion detection settings on your Ubiquiti UVC-G3 Flex camera, follow these steps:

1. Log in to the camera's web interface by opening a web browser and entering the IP address of the camera. The default IP address is 192. If you changed the IP address during setup, use that instead. Enter your login credentials (the default username is ubiquiti, and the password is password) and click "Login. Click on the "System" tab in the left-hand menu, then select "Motion Detection" from the drop-down menu. In the Motion Detection settings, you can enable motion detection by toggling the switch to the right of "Enable" to the "On" position. You can also choose whether motion detection is active all the time or only during specific hours by selecting either the "24h" or "Scheduled" option from the "Motion Detection Mode" drop-down menu. If you selected the "Scheduled" option, click the "Add Rule" button to set up a schedule for motion detection. You can also edit or delete existing rules by clicking on them in the list below. In the Edit Schedule dialog box, enter the start and end times of the schedule (in 24-hour format) and give it a name. Click "Save" to save your changes. To further fine-tune motion detection settings, click on the "Motion Sensitivity" tab. Here you can adjust various parameters related to motion sensitivity and threshold, such as horizontal and vertical lines of motion, distance between motion events, and image processing settings like noise reduction and motion blurring. Click on the "Events" tab to configure what happens when motion is detected. Here you can choose whether to send an email or SMS alert, record video, or trigger an external device (such as a relay) based on motion events. You'll need to provide the necessary settings for each option (e. Save your changes and test your motion detection settings to make sure everything is working properly. Remember that motion detection settings can have an impact on the camera's performance and resource usage, so it's a good idea to test them in a controlled environment before deploying them in production. If you need further assistance or have any questions, please refer to the UVC-G3 Flex user guide or contact Ubiquiti support for more information.

How do I properly mount and configure the Ubiquiti UVC‑G3 Flex surveillance camera for optimal performance in my home or office setting?

To properly mount and configure the Ubiquiti UVC-G3 Flex surveillance camera for optimal performance in your home or office setting, please follow these steps:

1. Choose an appropriate location for the camera that provides a clear view of the desired area. The camera is designed to be mounted on walls, ceilings, or other surfaces using the included mounting hardware. Make sure the power source is easily accessible as well. Power on the camera and connect it to your network using an Ethernet cable. If you prefer a wireless connection, make sure the camera is within range of your Wi-Fi access point. Access the camera's web interface by opening a web browser and entering the camera's IP address (which should be printed on the label on the bottom of the camera) into the address bar. If you don't know the IP address, you can find it using your router's DHCP client list or by scanning your network for devices using a tool like Fing or Angry IP Scanner. Log in to the camera with the default username and password (both are "admin"). You will be prompted to change the password during setup, which is recommended for security reasons. Configure the camera's basic settings, such as time zone, language, and date format. You can also set up a schedule for the camera to turn on and off automatically at specific times of day. Configure the camera's video settings, including resolution, frame rate, and bitrate. Higher values will result in better image quality but also require more bandwidth and storage space. Find a balance that works best for your needs. Set up motion detection and alerts, such as sending an email or pushing a notification to your smartphone when motion is detected. You can also set up recording schedules and trigger zones to focus on specific areas. Configure network settings, including IP address allocation (static or DHCP), subnet mask, gateway, and DNS servers. If you're using a VLAN or QoS setup, make sure the camera is configured correctly. Set up user accounts with different levels of access, such as administrator, operator, and viewer. This can help prevent unauthorized access to your camera system. Test the camera's operation by viewing live video and checking recorded footage. Make sure everything is working as expected and make any necessary adjustments. Consider adding additional cameras to your network for comprehensive coverage of your property. The UVC-G3 Flex is part of Ubiquiti's UniFi line, which allows for easy integration and management of multiple cameras using a single platform. By following these steps, you should be able to mount and configure the Ubiquiti UVC-G3 Flex surveillance camera for optimal performance in your home or office setting. If you encounter any issues during setup, consult the camera's user manual or reach out to Ubiquiti support for assistance.

What are the features of Ubiquiti UVC‑G3 Flex?

If you are interested in wifi standards, which define speed and method of radio data transmission, are used in Ubiquiti UVC‑G3 Flex , it has 802.3af. In our article you will find the necessary information about the methods used for radio transmission, and what the magic letters ab, g, n mean. You can find it here.

Is Ubiquiti UVC‑G3 Flex a flagship product?

The year 2020 will certainly be remembered as the time when we paid special attention to our safety and that of our loved ones. We checked which of the products for environmental observation were particularly appreciated by users. Is Ubiquiti UVC‑G3 Flex one of the best? Check out our article.