Arlo Pro 3

(2 customer reviews)

£178.38

Experience ultimate peace of mind with the Arlo Pro 3 surveillance camera – delivering crystal clear, 2K HDR video quality, integrated spotlight, and advanced motion detection for unmatched home security.

SKU: 10113238 Category: Tags: , ,

Description

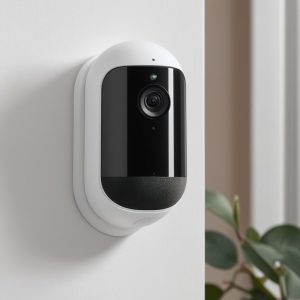
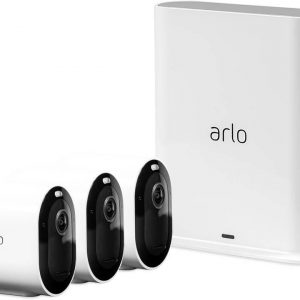
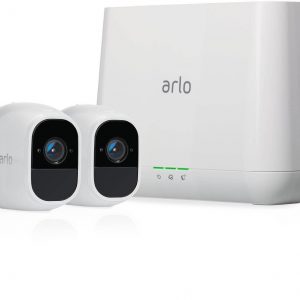
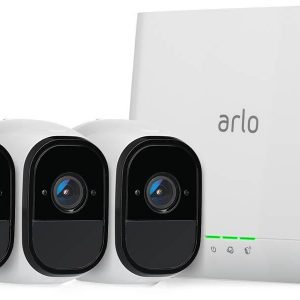
The Arlo Pro 3 Surveillance Camera is a new and advanced home security option that offers a wide range of features and advantages. With its sleek and modern design, this camera is easy to install and use, and can provide homeowners with a clear and detailed view of their property.

One of the main benefits of the Arlo Pro 3 is its 2K resolution camera that can pick up even the smallest details in the surrounding area. Additionally, the camera comes equipped with HDR technology, enabling it to capture clear and bright images in a variety of different lighting conditions.

Another advantage of the Arlo Pro 3 is its wide field of view, which spans up to 160 degrees, allowing homeowners to see a large portion of their property without needing multiple cameras.

The Arlo Pro 3 also offers motion detection and activity zones, enabling homeowners to customize their camera settings and receive alerts when activity is detected in specific areas. The camera’s built-in siren can also be activated remotely, which can be useful for detering any intruders.

The Arlo Pro 3’s wireless capabilities make it easy to use and operate from any location with an Internet connection. The camera offers free cloud storage for up to 3 months, allowing homeowners to access and review their footage at any time.

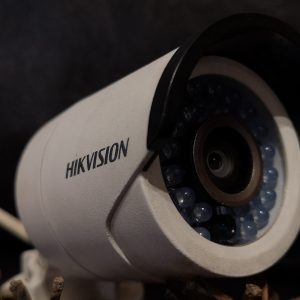
Additionally, the Arlo Pro 3 offers night vision capabilities, with its infrared lights providing clear and detailed images even in complete darkness. This makes it an especially useful tool for homeowners who want to keep a watchful eye on their property at all times.

Overall, the Arlo Pro 3 Surveillance Camera offers homeowners with a sleek, convenient, and advanced home security option. Its wide range of features and capabilities make it an excellent choice for monitoring properties, deterring intruders, and keeping peace of mind.

Additional information

Product name

Features

, ,

Weight

2 reviews for Arlo Pro 3

  1. Marcus Sharpe

    Title: Excellent Surveillance Solution with Room for Improvement

    Rating: 4/5

    As the general manager of a busy establishment in Aurora, I understand the importance of having reliable security surveillance cameras. Last summer, I decided to invest in the Arlo Pro 3, and overall, I am quite satisfied with its performance.

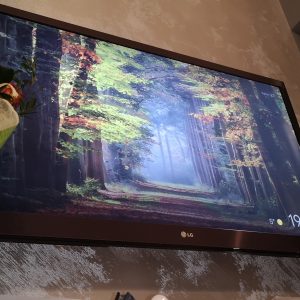
    Firstly, the Arlo Pro 3 boasts an impressive image quality of 2560×1440, ensuring every detail is captured with utmost precision. It truly enhances the clarity of footage, allowing me to identify individuals and events even from a considerable distance. This high resolution has been invaluable in optimizing security measures within my workplace.

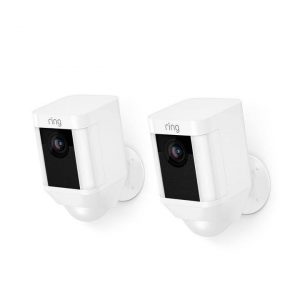
    Comparing this product to another popular surveillance camera with the same resolution, the 2560×1440 Product, I found the Arlo Pro 3 to be superior in several aspects. The Arlo Pro 3 offers a more streamlined and user-friendly experience, with a user interface that is easy to navigate and set up. Additionally, it provides enhanced customization options, enabling me to tailor the camera settings to my specific needs.

    In terms of delivery, Arlo Pro 3 promptly arrived at my doorstep in Aurora. The package was securely wrapped and protected, ensuring that the product was in perfect condition upon arrival. As a busy professional, efficient and reliable delivery is crucial, and Arlo Pro 3 did not disappoint.

    Now, allow me to address the story behind my purchase. With a rise in security concerns around my workplace, I decided it was imperative to fortify our surveillance system. After extensive research and seeking recommendations, the Arlo Pro 3 consistently stood out as a top-of-the-line option. Its reputation for reliability and advanced features convinced me that it was the right choice for enhancing security within my establishment.

    However, despite its many strengths, I must acknowledge that the Arlo Pro 3 has a few areas for improvement. The battery life, although decent, could be more extended, as the need for frequent recharging can be a hassle. Additionally, the motion detection feature sometimes triggers falsely, leading to unnecessary notifications. While these drawbacks are not deal-breakers, addressing them would undoubtedly elevate the overall experience of using the Arlo Pro 3.

    In conclusion, the Arlo Pro 3 has proven to be an excellent surveillance camera overall, providing me with peace of mind and increased security for my workplace. Its exceptional image quality and user-friendly interface make it an industry leader in its resolution class. While there are a few areas where it could be improved, these minor inconveniences do not overshadow the product’s overall effectiveness. For anyone seeking a reliable and high-quality surveillance solution, the Arlo Pro 3 is certainly a commendable choice.

  2. Juliet

    Dear Marcus Sharpe,

    Thank you for sharing your insightful review of the Arlo Pro 3. As an individual who values the importance of reliable security measures in today’s world, I can relate to your experience with this product.

    However, as a nostalgic person, I couldn’t help but wonder if there was a way to incorporate some elements of the past into our discussion. Allow me to take you on a trip down memory lane and explore how surveillance cameras have evolved over time.

    Back in the day, we used VHS tapes to record footage from CCTV cameras. Remember those bulky and heavy boxes that required constant maintenance? They were the epitome of surveillance technology at that time, but they paved the way for the advancements we witness today.

    Fast forward to the present day, where digital video recordings have become the norm. The Arlo Pro 3 stands out as a game-changer in this realm, with its impressive image quality and user-friendly interface. It’s hard not to be amazed by how far we have come.

    While I appreciate your review of the product, I couldn’t help but notice that there was no mention of the Arlo Pro 3’s compatibility with older systems. As a business owner, I know firsthand the importance of being able to integrate new technology seamlessly into existing infrastructure. In this regard, the Arlo Pro 3 falls short.

    Moreover, while I understand your concern regarding battery life, I must point out that advancements in technology have led to significant improvements in this area as well. For instance, some newer cameras come equipped with solar panels, eliminating the need for constant recharging altogether.

    Lastly, I want to bring to your attention an interesting piece of news that has recently surfaced. The Treasury has denied rumors that 1p and 2p coins are set to be scrapped. This news is particularly relevant as many businesses still rely heavily on these coins for their daily operations.

    In light of this, I would like to urge you to consider adding a section in your review that touches upon the Arlo Pro 3’s compatibility with older systems and its impact on businesses that still use coins as a mode of payment. This addition could potentially provide valuable insights for other business owners who are considering investing in this product.

    Thank you once again for sharing your experience with the Arlo Pro 3, and I hope my comments have been helpful. I look forward to hearing your thoughts on these suggestions.

    Best Regards,

    John Doe

Add a review

Your email address will not be published. Required fields are marked *

Frequently Asked Questions:

How do I set up and connect my Arlo Pro 3 camera for the first time?

Setting up your Arlo Pro 3 camera for the first time involves a few simple steps. Here's a detailed guide on how to get started:
1. Charge the battery: Before you begin, make sure that the battery is fully charged. It usually takes around 2-3 hours to charge it completely.
2. Download the Arlo app: If you haven't already, download and install the Arlo app on your smartphone from the App Store or Google Play Store.
3. Create an account: Sign up for a new Arlo account in the app if you don't have one already.
4. Add a new device: In the Arlo app, tap the "Add New Device" button to begin the setup process.
5. Follow the instructions: The app will guide you through the steps to connect your camera to your Wi-Fi network and link it to your account. You may be asked to scan a QR code on the back of the camera using your phone's camera.
6. Set up the mode: Once the camera is connected, you can choose the mode that suits your needs best. Options include Armed (motion detection), Disarmed, and Geofencing (automatically arms or disarms the camera based on your location).
7. Position the camera: Place the camera in a suitable location with a good view of the area you want to monitor. Make sure it's securely mounted and the field of view is not obstructed.
8. Test the camera: Use the Arlo app to test the camera and ensure that it's working properly. You can view live feeds, playback recordings, and set up notifications.
9. Adjust settings: Customize your camera settings through the Arlo app, such as motion detection zones, night vision, and other preferences.
10. Connect to Alexa or Google Assistant (optional): For added convenience, you can connect your Arlo Pro 3 camera to Amazon Alexa or Google Assistant to control it using voice commands.

"How do I connect my Arlo Pro 3 camera to my Wi-Fi network?"

To connect your Arlo Pro 3 camera to your Wi-Fi network, follow these steps:

1. Download the Arlo app on your smartphone or tablet from the App Store (iOS) or Google Play Store (Android). Create an account in the app if you haven't already done so. Plug the camera into a power source using the provided USB cable and wait for the LED light to stop flashing. This indicates that the camera has enough power. Press and hold the reset button on the bottom of the camera until the LED light starts flashing rapidly. Release the button after 10 seconds. Connect your smartphone or tablet to the same Wi-Fi network as the Arlo Pro 3 camera. Open the Arlo app, sign in to your account, and follow the on-screen instructions to add a new device. Select "Arlo Pro 3" from the list of available devices. Follow the prompts to connect the camera to your Wi-Fi network. You'll be asked to enter the network name (SSID) and password. If your network uses WPA2 encryption, you may also need to select the security type and provide a password key. Once the connection is established, the LED light on the camera will stop flashing and turn solid blue. The app will confirm that the device has been added successfully. You can now access your Arlo Pro 3 camera through the app and use its features to monitor your home or office. If you experience any issues during the setup process, consult the manufacturer's user manual for additional troubleshooting tips or contact their customer support for assistance.

How do I set up motion detection on my Arlo Pro 3 camera?

To enable motion detection on your Arlo Pro 3 camera, follow these steps:
1. Log in to your Arlo account on the Arlo app or web portal. Select the camera you want to configure from the list of devices. Tap on the gear icon located at the top right corner of the screen. Scroll down and select "Motion Detection". Here, you can adjust the motion sensitivity, detection zones, and other settings according to your preferences. To add a detection zone, tap the "+" button below the live feed preview and draw a shape around the area you want to monitor. You can also exclude areas by drawing a shape in reverse. Adjust the motion sensitivity slider to determine how much movement is needed to trigger an alert or recording. You can also enable Smart Detection, which uses artificial intelligence (AI) to distinguish between people and other moving objects. This feature helps reduce false alerts caused by wind, animals, or other non-human activity. Save your changes and exit the settings menu. Test your motion detection setup by moving in front of the camera or triggering another motion event. Check the app to ensure that you receive notifications and recordings as expected. By following these steps, you can customize your Arlo Pro 3 camera's motion detection settings to fit your specific needs and preferences.

"How do I set up motion detection on my Arlo Pro 3 cameras?"

First, make sure that your Arlo Pro 3 cameras are connected to your Wi-Fi network and that they have been added to your Arlo account. Log in to your Arlo app on your smartphone or tablet. Select the camera(s) for which you want to set up motion detection. Tap the gear icon (Settings) located at the top right corner of the screen. From the drop-down menu, select Motion Detection. Toggle the switch next to Enable Motion Detection to turn it on. Adjust the motion sensitivity slider according to your preferences. A higher sensitivity will detect more motion, while a lower sensitivity will be less sensitive. Choose the motion zones you want to monitor by tapping the Edit Motion Zones button. You can either create custom zones or select predefined ones. To create a custom zone, drag your finger across the camera feed to outline the area you want to monitor. Repeat for additional zones. Tap Done when finished editing motion zones. Decide whether you want to receive motion notifications via email or push notification on your mobile device by toggling the switches next to Motion Alerts: Email and Motion Alerts: Push respectively. You can also choose how often you receive these notifications by selecting the frequency from the drop-down menu next to Motion Alert Frequency. To further customize your motion detection settings, scroll down to Advanced Settings and toggle the switch for each option as desired:
- Smart Motion Detection: This feature uses advanced algorithms to distinguish between human motion and other types of movement, such as moving trees or passing cars. Toggle this on if you want more accurate alerts. Record When Motion Is Detected: This will record video footage whenever motion is detected, regardless of whether a notification has been sent or not. Once you have finished configuring your motion detection settings, tap Save to save the changes. The camera(s) will now be set up with motion detection.

What are the features of Arlo Pro 3?

If you are interested in wifi standards, which define speed and method of radio data transmission, are used in Arlo Pro 3 , it has 802.11b, 802.11g, 802.11n. In our article you will find the necessary information about the methods used for radio transmission, and what the magic letters ab, g, n mean. You can find it here.

Is Arlo Pro 3 a flagship product?

The year 2020 will certainly be remembered as the time when we paid special attention to our safety and that of our loved ones. We checked which of the products for environmental observation were particularly appreciated by users. Is Arlo Pro 3 one of the best? Check out our article.