Victron 175W-12V Mono

$134.00

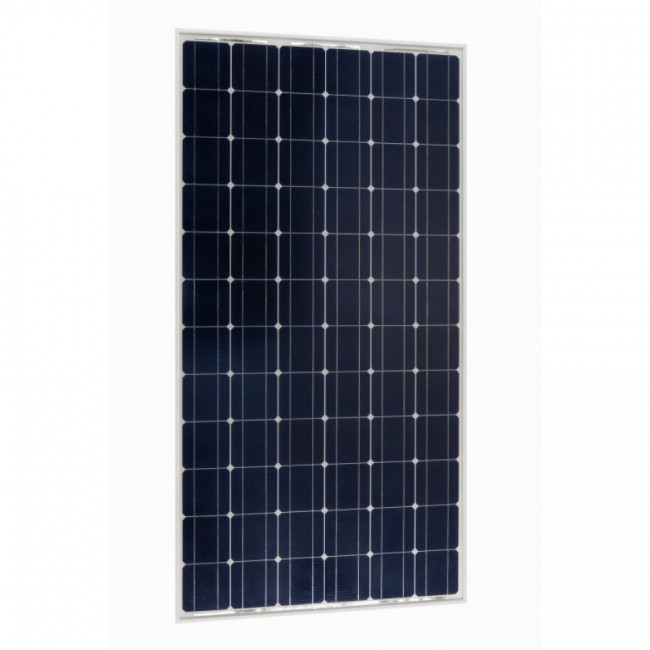
Victron 175W-12V Mono is a 175w mono photovoltaic solar panel made with 36 monocrystalline silicon cells and featuring low voltage-temperature coefficient, a sealed, waterproof, multi-functional junction box for safety, high performance bypass diodes, a sturdy anodized aluminium frame, and high-transmission tempered glass for enhanced stiffness and impact resistance.

SKU: victron-175w-12v-mono Category: Tags: , ,

Description

Victron 175W-12V Monocrystalline Solar Panel

PRODUCT FEATURES

• Low voltage-temperature coefficient enhances high-temperature operation.
• Exceptional low-light performance and high sensitivity to light across the entire solar spectrum.
• 25-Year limited warranty on power output and performance.
• 5-Year limited warranty on materials and workmanship.
• Sealed, waterproof, multi-functional junction box gives high level of safety.
• High performance bypass diodes minimize the power drop caused by shade.
• Advanced EVA (Ethylene Vinyl Acetate) encapsulation system with triple-layer back sheet meets the
most stringent safety requirements for high-voltage operation.
• A sturdy, anodized aluminium frame allows modules to be easily roof-mounted with a variety of
standard mounting systems.
• Highest quality, high-transmission tempered glass provides enhanced stiffness and impact resistance.
• High power models with pre-wired quick-connect system with MC4 (PV-ST01) connectors.

Reviews

There are no reviews yet.

Be the first to review “Victron 175W-12V Mono”

Your email address will not be published. Required fields are marked *

Frequently Asked Questions:

How should I install and maintain my Victron 175W-12V Mono solar panel?

To ensure optimal performance and a long life for your Victorn 175W-12V Mono solar panel, follow these installation and maintenance instructions:

1. Installation:
- Choose an appropriate location with direct sunlight exposure and minimal shading. Make sure the surface is clean and free of debris before attaching the solar panel. Use high-quality mounting brackets or racks to securely attach the solar panel to your roof, ground, or any other support structure. Connect the solar panel to a compatible charge controller and inverter/charger. Follow all electrical safety precautions when wiring the system. Ensure that the cable connections between the solar panel and other components are weatherproof and well-secured. Maintenance:
- Regularly inspect the solar panel for any signs of damage, such as cracks or discoloration. Clean the surface of the solar panel with mild soap and water to remove dirt, dust, or debris. Be cautious not to scratch the surface. Ensure that no vegetation is growing near the solar panel, as it can block sunlight and reduce performance. Keep the charge controller and inverter/charger well-maintained by periodically checking for any signs of overheating or electrical issues. By following these installation and maintenance guidelines, you will help ensure that your Victorn 175W-12V Mono solar panel performs optimally and lasts for many years.

What is the maximum voltage and current output from my solar panel when connected directly to a Victron 175W-12V Mono inverter, and how do I calculate this information?

The maximum voltage and current output of your solar panel will depend on its specifications. To determine these values, you will need the following information about your solar panel:

- Voltage (V): This is usually listed as the open circuit voltage or OCV. It's the voltage across the terminals of a solar panel when there is no load connected to it. For example, if your solar panel has an OCV of 20 volts, this means that it can produce 20 volts when there are no loads attached. Current (A): This is usually listed as the maximum power output or MPP current. It's the amount of current the solar panel can produce at its maximum power point under standard test conditions (STC). For example, if your solar panel has an MPP current of 10 amps, this means that it can deliver up to 10 amps when exposed to direct sunlight and operating at its optimal efficiency. Once you have these values, you can calculate the maximum voltage output by multiplying the number of panels by the individual panel's OCV (in volts). For example, if you have two solar panels with an OCV of 20 volts each, your total voltage output would be 40 volts. The current output can be calculated similarly by multiplying the number of panels by their respective MPP currents. So, using our previous example, if each panel has an MPP current of 10 amps, your total current output would be 20 amps (10 x 2 = 20). To calculate the maximum voltage and current output from your solar panel when connected directly to a Victron 175W-12V Mono inverter, you will need to know both the voltage and current outputs of the solar panel mentioned above. Once you have these values, you can input them into the specifications for your inverter to determine its compatibility and maximum output capabilities. Note: It's important to consider safety measures when connecting high-voltage equipment like solar panels and inverters. Always use appropriate cabling and connectors designed for handling such voltages, and make sure you follow any safety guidelines provided by the manufacturer of your equipment.

How do I ensure proper installation and performance of my newly purchased Victron 175W-12V Mono solar panels?

To ensure proper installation and performance of your newly purchased Victron 175W-12V Mono solar panels, please follow these steps:

1. Choose a suitable location for the solar panels that receives maximum sunlight. The panels should be installed facing south (in the northern hemisphere) or north (in the southern hemisphere), and at an angle equal to the latitude of your location plus 15 degrees. For example, if you live in a location with a latitude of 40 degrees, you should install the panels at an angle of 55 degrees. Clean the surface of the solar panels regularly to ensure maximum sunlight absorption. Use a soft-bristled brush and water to remove any dirt or debris that may have accumulated on the panels. Ensure that the wiring connections between the solar panels and your Victron power system are properly installed and secured using weatherproof connectors. It is also recommended to use a voltage detector to confirm that the wiring connections are correctly configured. Monitor the performance of the solar panels regularly to ensure that they are meeting expected output levels. Use a multimeter to measure the voltage, current, and power output of each panel individually, as well as the total system output. Any discrepancies or inconsistencies should be investigated further to identify any issues with the installation or the panels themselves. If you notice any problems with the performance of your solar panels, such as reduced output levels or unexplained voltage fluctuations, contact Victron's technical support team for assistance. They can provide guidance on troubleshooting and resolving any issues that may arise. By following these steps, you can ensure that your Victron 175W-12V Mono solar panels are installed and performing optimally, providing the maximum amount of renewable energy possible to power your off-grid system.

How do I properly connect the Victron 175W-12V Mono solar panels to my system for optimal performance?

To properly connect Victron 175W-12V Mono solar panels to your system for optimal performance, follow these steps:

1. Determine the number of solar panels needed based on your power requirements and available space. The 175W-12V Mono panels are suitable for systems where battery charging is required at 12 volts. Choose the appropriate connectors based on the wiring configuration of your system. Victron offers a range of connector options, including MC4, MCB, and BNC connectors. Make sure that you select connectors with corresponding polarities for positive (red) and negative (black) terminals. Clean the surfaces of the solar panels and connectors thoroughly using an isopropyl alcohol-soaked cloth to remove any dirt or debris. This will ensure a good electrical connection between the panels and your system. Connect the positive terminal of one panel to the negative terminal of the next panel in series to form a string of panels, ensuring that the polarities are correct. Use MC4 connectors with corresponding polarities for positive (red) and negative (black) terminals. Repeat this process until all required panels have been connected. Connect one end of the string of panels to your Victron charge controller or inverter/charger using a compatible connector, such as MC4 or BNC. Ensure that the positive and negative terminals are connected correctly based on the polarity of the connectors used. Connect the other end of the string of panels to your battery bank, using a compatible connector, such as MCB, BNC, or ring terminal connectors. Again, ensure that the positive and negative terminals are connected correctly based on the polarity of the connectors used. If required, use combiner boxes or junction boxes to combine multiple strings of panels into a single output, providing you with additional flexibility in system design. These devices also provide an additional point for monitoring the voltage and current levels of your solar array. Monitor the performance of your solar system regularly using a multimeter or Victron's Smart Battery Monitor (SBM) to ensure that it is operating at optimal efficiency. Use this data to make informed decisions about future upgrades or expansions to your system. By following these steps, you can ensure that your Victron 175W-12V Mono solar panels are properly connected to your system for optimal performance and reliability.

Related Products