Trina VertexS TSM-400DE09.08

$180.00

The Trina VertexS TSM-400DE09.08 is a monocrystalline solar panel manufactured by Trina Solar. The panel has a maximum power output of 400 watts and is designed to operate at a voltage of 36.8 volts.

SKU: trina-vertexs-tsm-400de09-08 Category: Tags: , ,

Description

Trina VertexS TSM-400DE09.08 solar module
120 cells, 400 Wp nominal output, framed Monocrystalline High Power solar module

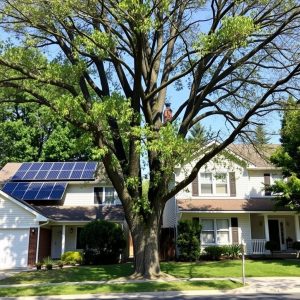
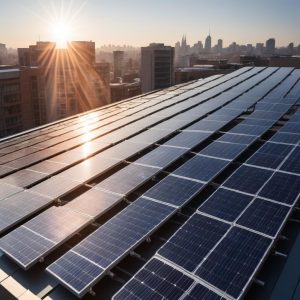
Designed for Residential and Commercial & Industrial (C&I) rooftops
Based on advanced technology from the Vertex platform. The new Vertex S 400W module is perfectly designed to fulfill power, efficiency, size, weight, appearance, mechanical load, reliability requirements of rooftop application! Best balance of power and size&weight.

Universal solution
Designed for compatibility with existing mainstream optimizers, inverters and mounting systems.
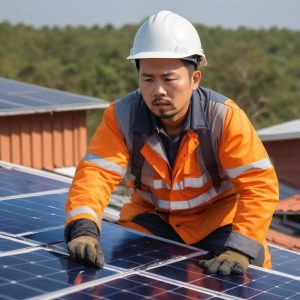
Perfect size and low weight. Easy for handling. Economy for transporting.
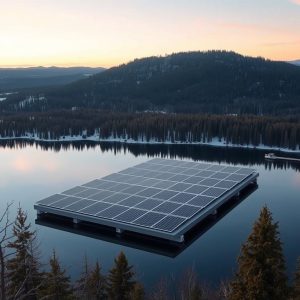
Diverse installation solutions. Flexible for system deployment.

Small in size, big on power
Generate a huge amount of energy even in limited solar plant space. Up to 400W, 20.8% module effciency with high density interconnect technology
Multi-busbar technology for better light trapping effect, lower series resistance and improved current collection
Reduce installation cost with higher power bin and eciency
Boost performance in warm weather with lower temperature coeffcient (-0.34%) and operating temperature

High Reliability
15 year product warranty
25 year performance warranty with lowest degradation;
Ensured PID resistance through cell process and module material control
Mechanical performance up to 6000 Pa positive load and 4000 Pa negative load

Mechanical Data:

  • 120 monocrystalline cells (5 × 24)
  • Module Dimensions: 1754×1096×30 mm
  • Frame: 30 mm Anodized Aluminium Alloy
  • Weight: 21,0 kg
  • Modules per packing box: 36 pieces
  • Glass: 3.2 mm, High Transmission, AR Coated Heat Strengthened Glass
  • Encapsulant Material: EVA / POE
  • Backsheet: White
  • J-Box: IP68 rated
  • Cables: Photovoltaic Technology Cable 4.0mm2, L-110cm (for landscape layout)
  • MC4 EVO2 connectors
  • Warranty: 15-year manufacturer guarantee; 25-year linear output warranty with 0,55% annual output reduction

1 review for Trina VertexS TSM-400DE09.08

  1. Katherine

    Good afternoon, my name is Katherine and I am thrilled to share my experience with purchasing the Trina VertexS TSM-400DE09.08 from this esteemed online store some months ago. I have been a longtime advocate for renewable energy solutions, and the VertexS TSM-400DE09.08 has truly exceeded my expectations in terms of efficiency and performance.

    As someone who enjoys seared salmon and roasted potato salad, I am acutely aware of the impact that traditional cooking methods have on the environment. The VertexS TSM-400DE09.08 has allowed me to significantly reduce my carbon footprint while still enjoying delicious meals in the comfort of my own home.

    I remember receiving a call from a telemarketer last week, asking if I was interested in buying solar panels. It brought back memories of similar calls I’ve received in the past, but this time I felt empowered to share some tips and tricks for anyone considering making the switch to renewable energy.

    Firstly, do your research. There are a plethora of solar panel options on the market, each with their own unique benefits and drawbacks. Take the time to read reviews, compare features, and consult with experts in the field before making a decision.

    Secondly, consider the long-term benefits. While initial costs may be higher than traditional energy sources, the savings you’ll reap over time will far outweigh the investment. Not to mention the positive impact on the environment and your carbon footprint.

    Lastly, look for reputable sellers. The online store where I purchased my VertexS TSM-400DE09.08 has an outstanding track record of customer satisfaction and quality products. Do your due diligence to ensure you’re working with a trustworthy seller.

    As the news today reminds us, there are still many issues left unresolved from our troubled past. But by making small changes in our daily lives, like switching to renewable energy sources, we can all do our part to create a brighter future. Thank you for listening, and I hope these tips have been helpful for anyone considering making the switch to solar power. Until next time, take care!

    [Product name: Trina VertexS TSM-400DE09.08]

    [Despair style: The world as we know it is crumbling before our very eyes, and there seems to be no hope for a brighter future. The government’s pledge to repeal the Troubles legacy act is but a fleeting glimmer of light in an otherwise bleak landscape.]

Add a review

Your email address will not be published. Required fields are marked *

Frequently Asked Questions:

How do I properly connect and integrate Trina VertexS TSM-400DE09.08 solar panels into my off-grid system for maximum efficiency?

To properly connect and integrate Trina VertexS TSM-400DE09. Determine the appropriate number of panels required based on your energy needs. The Trina VertexS TSM-400DE09. W and an open circuit voltage (Voc) of around 45 V. To calculate the number of panels needed, divide your daily energy consumption in watt-hours by 365 W per panel and round up to the nearest integer. Choose a suitable location for the solar array. The panels should be installed on a tilted surface facing south (in the Northern Hemisphere) or north (in the Southern Hemisphere), with an angle equal to your latitude plus 15 degrees. This will ensure maximum energy production throughout the year. Connect the panels in series using MC4 connectors. Each panel has two sets of positive and negative terminals, labeled P1, N1, P2, and N2. To increase the voltage output, connect the P1 and P2 terminals of adjacent panels together with a MC4 connector. The N1 and N2 terminals should be connected in parallel using another MC4 connector. This will form a series string with a total voltage equal to the Voc of each panel plus any additional voltage drop from the connectors. Connect the series strings in parallel using a combiner box. The combiner box allows multiple series strings to be connected together, providing more flexibility in system design and reducing the number of wires required. Use MC4 connectors to connect the positive and negative terminals of each series string to the corresponding terminals on the combiner box. Connect the output of the combiner box to a charge controller or battery charger, which will regulate the voltage and current entering the batteries to prevent overcharging. The charge controller should be chosen based on the total power output of your solar array. Finally, connect the batteries to your loads using a distribution panel or other load management system. This will allow you to efficiently distribute the available power to your various appliances and devices while ensuring that the batteries are not discharged below their recommended voltage levels. Remember to always follow proper safety procedures when working with electricity, including wearing appropriate protective gear and avoiding contact with live wires or components. Additionally, it may be helpful to consult a qualified electrician or solar installer for assistance with design and installation.

"How do I properly install and connect the Trina VertexS TSM-400DE09.08 solar panels in a residential rooftop system?"

Firstly, ensure that you have all the necessary equipment and tools for installation such as roof anchors, flashing, electrical wires, screws, a voltage tester, and a multimeter. Before starting the installation process, it is crucial to check whether your roof structure can bear the weight of the solar panels. Consult with a structural engineer if necessary. Clean the roof surface thoroughly using water and soap to remove dirt, debris or any contaminants that may interfere with the solar panel's efficiency. Allow the roof to dry completely before beginning the installation process. Install roof anchors at regular intervals along the roof ridge line. The number of anchors required will depend on the length of the ridge line and the weight of the panels being installed. Follow the manufacturer's instructions regarding the spacing between the anchors. Lay out the solar panels on the roof, starting from one end of the ridge line, ensuring that they are level and evenly spaced apart. Use a spirit level to ensure that each panel is perfectly aligned horizontally. Attach the first panel to the roof using screws and a power drill. Ensure that the screws are driven in at an angle of 45 degrees to avoid penetrating the waterproof membrane underneath the panels. Connect the electrical wires between adjacent panels, following the manufacturer's guidelines for polarity and connection type. Use wire connectors, crimpers or wire nuts as required by the manufacturer. Install flashing around the perimeter of each panel to prevent water from entering the roof structure. Ensure that the flashing is properly secured using roofing nails or screws. Connect the panels together in series and parallel to form a string or an array, depending on your system's requirements. Use junction boxes to connect the strings together and to provide a central point for connection to the inverter. Install the inverter near the electrical panel inside the house. Follow the manufacturer's instructions for connecting the wires between the inverter and the solar panels, ensuring that the correct polarity is maintained. Use a multimeter to verify the voltage output from the inverter and check for any faults or errors. Finally, ensure that all connections are properly insulated and covered with waterproofing material such as electrical tape or vinyl strips. This will help prevent moisture ingress into the system and reduce the risk of electrical shock. Always wear proper safety gear such as hard hats, gloves, and safety goggles when working on the roof to protect yourself from falling debris or accidents. Follow all local building codes and permitting requirements for your specific location. Regularly inspect the solar panels for any damage or issues, clean them periodically, and maintain them properly to ensure optimal performance over time.

Related Products