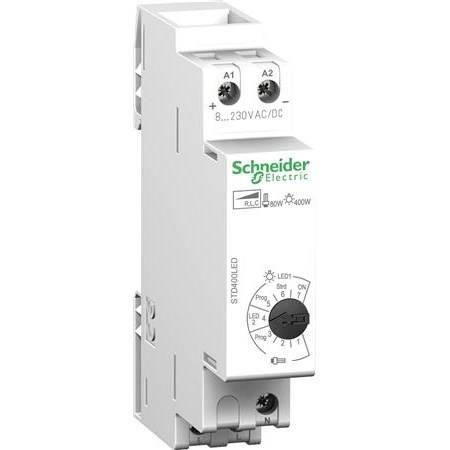
Schneider Acti 9 STD CCTDD20016

$45.99

Description

Dimmer, Rated Current 16A, Universal Dimmer, Indoor, Led, Halogen, Incandescent, Touch, White

Schneider Acti 9 STD CCTDD20016 properties

Product nameActi 9 STD CCTDD20016
TypeDimmer
DimmerUniversal Dimmer
Suitable for lamp typeHalogen, Incandescent, Led
Area of UseIndoor
Max load Incandescent400 W
Max Load Led60 W
Max Load halogen400 W
Max Load Electronic transformers300 W
Rotating or TouchTouch
Voltage230 V
Rated Current16.0 A
ColourWhite
Height8.5 cm
Width1.8 cm
Depth6.0 cm
Weight65.0 g

Additional information

Product name

Product type

Dimmer

Suitable for lamp type

, ,

Area of Use

Max load Incandescent

Max Load Led

Max Load halogen

Rotating or Touch

Voltage

Rated Current

Colour

Height

Width

Depth

Weight

Reviews

There are no reviews yet.

Be the first to review “Schneider Acti 9 STD CCTDD20016”

Your email address will not be published. Required fields are marked *

Frequently Asked Questions:

How do I connect the Schneider Acti 9 STD CCTDD20016 to a lighting circuit and program it using its control module?

To connect the Schneider Acti 9 STD CC TD D20016 to a lighting circuit, follow these steps:
1. Identify the appropriate circuit in your electrical panel where you want to install the Acti 9. It should be a dedicated circuit for lighting and not shared with any other appliances or devices.
2. Turn off the main power supply to ensure safety while working with electricity.
3. Disconnect the wires from the existing switch or socket in the circuit.
4. Connect the live (L1) wire from the Schneider Acti 9 to one of the terminals in the circuit's electrical box.
5. Connect the neutral (N) wire from the Schneider Acti 9 to another terminal in the electrical box.
6. If your lighting circuit requires an earth (E) connection, connect it to a separate earth terminal.
7. Once all wires are connected, reattach the cover of the electrical box and secure it with screws.
8. Turn on the main power supply and test the circuit by turning on the Schneider Acti 9. If the lights turn on as expected, you have successfully connected the Acti 9 to the lighting circuit.
To program the Schneider Acti 9 using its control module, follow these steps:
1. Locate the control module, which is usually mounted next to the Schneider Acti 9.
2. Press and hold the "Program" button on the control module for at least five seconds until the LED indicator starts flashing rapidly. This indicates that the device is in programming mode.
3. Use the up and down buttons on the control module to adjust the dimming level of your lighting circuit. The LED indicator will display the current dimming level.
4. To save the settings, press and hold the "Program" button again for at least five seconds until the LED indicator stops flashing. This indicates that the device is now programmed with your desired dimming level.
5. Your Schneider Acti 9 is now connected to a lighting circuit and programmed using its control module.

How do I properly install the Schneider Acti 9 STD CCTDD20016 in my home networking system?

To install the Schneider Acti 9 STD CCTVD20016 in your home networking system, follow these steps:

1. Unpack the device and ensure you have all necessary components including the camera, power adapter, Ethernet cable, screws, mounting plate, and user manual. Identify a suitable location for the camera based on your desired field of view. It should be in a secure and dry area with good network connectivity. Mount the camera using the provided screws and mounting plate. Ensure it is level and secured tightly to avoid any potential hazards or instability. Connect one end of the Ethernet cable to the camera and the other end to your router or switch. This will allow the camera to communicate with your network. Power on the camera by plugging the power adapter into a nearby electrical outlet. The LED light on the front of the device should turn green to indicate it is powered correctly. Connect to the camera's wireless network using your computer or mobile device. This can be done by searching for available Wi-Fi networks and selecting the Acti 9 STD CCTVD20016 network. When prompted, enter the default username and password provided in the user manual. Once connected to the camera's wireless network, open a web browser on your computer or mobile device and type in the camera's IP address (default is 192. This will bring you to the camera's configuration page where you can adjust various settings such as timezone, language, network preferences, and video output. To stream live video feeds, access the camera's video playback feature through the Acti 9 STD CCTVD20016 app on your mobile device or by logging into your router's web interface and navigating to the camera's IP address. Perform regular maintenance such as cleaning the lens and checking for software updates to ensure optimal performance of the camera over time. Remember, it is essential to follow all safety precautions while installing the Schneider Acti 9 STD CCTVD20016, including avoiding high voltage areas and ensuring proper grounding of electrical components. If you encounter any difficulties during installation or setup, consult the user manual or contact customer support for further assistance.