Honeywell Series 9 DW915S

$34.99

Description

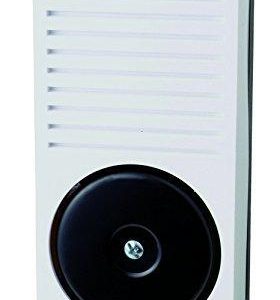
Doorbell, Push Button, Wireless Doorbell, White

Honeywell Series 9 DW915S properties

Product nameSeries 9 DW915S
TypeDoorbell
DorbellPush Button, Wireless Doorbell
ColourWhite
Number of Ringtones8 pcs
Lighting in Push ButtonYes
Range Wireless Transmitter200 m
Max Volume90 dB
Adjustable VolumeYes
Height12.6 cm
Width12.6 cm
Depth4.2 cm

Additional information

Product name

Product type

Dorbell

,

Colour

Number of Ringtones

Lighting in Push Button

Range Wireless Transmitter

Max Volume

Adjustable Volume

Height

Width

Depth

1 review for Honeywell Series 9 DW915S

  1. Journey Joyner

    The Honeywell Series 9 DW915S is a highly convenient and professional tool with a width of 12.6 cm. This compact size allows for easy maneuverability and ensures that it can be comfortably used in various professional settings.

    For amateur use, the Honeywell Series 9 DW915S offers a user-friendly experience. Its compact width of 12.6 cm makes it easy to handle and control, allowing amateurs to achieve accurate and precise cuts without much effort. The tool’s intuitive design and comfortable grip further enhance its usability for those less experienced in woodworking or construction tasks.

    On the other hand, professionals will also greatly appreciate the Honeywell Series 9 DW915S. Its 12.6 cm width ensures that it can fit into tight spaces and corners, making it ideal for intricate and precise cuts. The tool’s high-quality construction and durability also make it suitable for heavy-duty use in professional settings, ensuring longevity and reliability.

    The width of 12.6 cm in the Honeywell Series 9 DW915S is a standout feature. It strikes the perfect balance between being compact enough for easy handling and maneuvering, while still providing enough power and precision for both amateur and professional users. Whether it is for everyday DIY projects or demanding professional tasks, this tool’s width ensures versatility and efficiency.

Add a review

Your email address will not be published. Required fields are marked *

Frequently Asked Questions:

What is the proper way to install and program the Honeywell Series 9 DW915S smart thermostat?

Here's a step-by-step guide on how to properly install and program Honeywell Series 9 DW915S smart thermostat:

Materials needed:
- Screwdriver
- Level
- Tape measure
- Smartphone or computer with internet access
- Wrench (optional)

Instructions:

1. Turn off power to the HVAC system: Before starting the installation process, make sure you turn off power to your heating and cooling system by locating the breaker box in your home.

2. Remove old thermostat: Unscrew the existing thermostat from the wall using a screwdriver, then gently pull it away from the wall, leaving behind any wiring.

3. Locate the HVAC wires: The next step is to locate the HVAC (Heating, Ventilation, and Air Conditioning) wires in your home. These are typically located near the furnace or air handler unit. You may need a wrench to loosen any wire nuts connected to the old thermostat.

4. Install the mounting plate: Take the Honeywell Series 9 DW915S Smart Thermostat out of its packaging and place it on the wall where you want to install it. Make sure the top edge is level using a level tool. Use the included mounting plate and screws to securely attach the thermostat to the wall.

5. Connect the wires: Next, connect each wire from your HVAC system to their corresponding terminal on the back of the DW915S Smart Thermostat. The labels on both the thermostat and the HVAC system should match up easily, but here's a general guide:
- R (red) - Common/C
- W (white) - Heating/AUX heat
- G (green) - Cooling/Cool
- Y (yellow) - Heat pump/O/B
- C (blue) - Common/C (second connection)

6. Install batteries: After connecting all the wires, insert four AA batteries into their compartment on the back of the thermostat. This will power your new smart thermostat.

7. Setup through app or web portal: Download the Honeywell Home App from the App Store or Google Play, and follow the on-screen instructions to connect the thermostat to your home's WiFi network. Alternatively, you can also set it up via the web portal by visiting my.honeywell.com/smartthermostats/.

8. Program your schedule: Once connected, use the app or web portal to program your desired heating and cooling schedule based on your preferences and daily routines. The DW915S Smart Thermostat also offers geofencing capabilities that allow it to automatically adjust based on your location.

9. Turn power back on: Finally, turn the power back on at your breaker box to restart your HVAC system. Your new Honeywell Series 9 DW915S Smart Thermostat should now be up and running!

What is the correct wiring for connecting a Honeywell DW915S thermostat to a 24VAC heater?

To connect a Honeywell DW915S thermostat to a 24VAC heater, follow these steps:

1. Identify the wiring terminals on both the thermostat and the heater. The thermostat has six terminals labeled as follows: **R** (red), **W** (white), **G** (green), **Y** (yellow), **C** (blue), and **O/B** (orange or brown).

2. Identify the wiring connections for your 24VAC heater. The typical connections are: **R** (red) to the heater's power source, **W** (white) to the thermostat, and one of the following combinations for the other terminals based on the heating element type:
- For a single-pole, 24VAC resistance heating element: **G** (green) and **Y** (yellow) connect to each other.
- For a three-element, 24VAC resistance heating system:
* Connect the **O/B** (orange or brown) terminal of the thermostat to one common terminal on the heater control board.
* Connect the **G** (green) terminal to the first heating element terminal on the control board.
* Connect the **W** (white) terminal to the second heating element terminal.
* Connect the **Y** (yellow) terminal to the third heating element terminal.

3. Make sure your thermostat and heater are turned off before making any connections.
4. Connect the wires according to the instructions above, using wire nuts or other approved electrical connectors to secure the connections.
5. Turn on the power to the heater and test the system by setting the desired temperature on the thermostat and observing if the heating element responds accordingly.

How do I properly install the Honeywell Series 9 DW915S dishwasher drain hose?

Here's a step-by-step guide on how to properly install the Honeywell Series 9 DW915S dishwasher drain hose:

Materials needed:
- Honeywell Series 9 DW915S dishwasher drain hose
- Screwdriver (for removing old drain hose)
- Plumber's putty or silicone sealant
- Adjustable wrench (optional, for tightening drain connections)

Instructions:

1. Turn off the power to the dishwasher by unplugging it from the outlet or flipping the circuit breaker that controls its power supply. Remove the old drain hose by detaching it from both ends. Use a screwdriver to pry off any clips or retaining rings that hold the old hose in place, and then pull it out of the dishwasher and garbage disposal connections. If the old hose is secured with threaded fittings, use an adjustable wrench to loosen the nuts on both ends before removing the hose. Clean both ends of the drain connections thoroughly using a rag or paper towel to remove any debris or residue that may have accumulated during the removal process. This will ensure a tight and leak-free seal with the new hose. Apply plumber's putty or silicone sealant around the threads of the garbage disposal connection, if applicable. This will help prevent leaks and ensure a secure fit for the new drain hose. Insert one end of the Honeywell Series 9 DW915S dishwasher drain hose into the dishwasher's drain fitting, making sure it fits snugly but does not obstruct the flow of water. Secure it in place with any clips or retaining rings that came with the new hose or by tightening the nut on the threaded fitting, if present. Insert the other end of the Honeywell Series 9 DW915S dishwasher drain hose into the garbage disposal's drain connection, making sure it fits snugly but does not obstruct the flow of water. If the garbage disposal has a threaded fitting, screw the nut on by hand until it is snug; do not overtighten it, as this may damage the disposal or hose. Connect any clips or retaining rings that came with the new drain hose to secure it in place. If there are no clips or retainers, you can use a zip tie or wire twist tie to secure the hose in place. Turn on the water supply and test the dishwasher and garbage disposal to make sure the new drain hose is functioning properly and not leaking. Clean up any excess plumber's putty or silicone sealant around the drain connections, as this can attract debris and cause issues over time. Reconnect the power supply to the dishwasher and garbage disposal, and test the unit again to ensure everything is working properly. By following these steps, you should be able to install the Honeywell Series 9 DW915S dishwasher drain hose without any issues or leaks. If you encounter any difficulties during the installation process, it may be helpful to consult the manufacturer's instructions for further guidance.