Honeywell Series 9 DC917NG

£38.16

Description

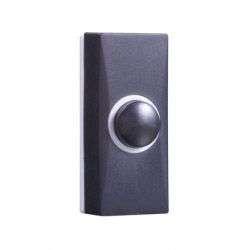
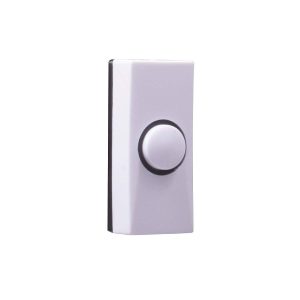
Doorbell, Wireless Doorbell, Grey

Honeywell Series 9 DC917NG properties

Product nameSeries 9 DC917NG
TypeDoorbell
DorbellWireless Doorbell
ColourGrey
Number of Ringtones8 pcs
Lighting in Push ButtonYes
Range Wireless Transmitter200 m
Max Volume90 dB
Adjustable VolumeYes
Height12.6 cm
Width12.6 cm
Depth4.18 cm

Additional information

Product name

Product type

Dorbell

Colour

Number of Ringtones

Lighting in Push Button

Range Wireless Transmitter

Max Volume

Adjustable Volume

Height

Width

Depth

1 review for Honeywell Series 9 DC917NG

  1. Hazel

    I recently bought the Honeywell Series 9 DC917NG digital doorbell and I must say, I am pretty impressed with its performance. The doorbell comes in a sleek and modern grey color which adds to the overall aesthetic appeal of my home.

    The Series 9 DC917NG has several features which differentiate it from other doorbells in the market. For instance, it is a wireless doorbell which means that I don’t have to worry about cabling or drilling holes in my wall. Additionally, it has a range of up to 200 meters which means that I can hear it ringing even when I am in my garden.

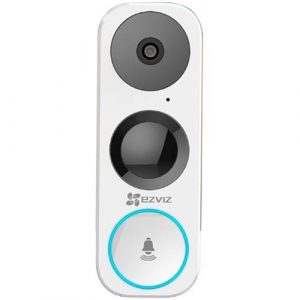
    The doorbell also has a high-quality camera which allows me to see who is at my doorstep before opening the door. This is particularly useful for me as I live alone and it gives me an added layer of security. The camera has a wide-angle view which means that I can see everything happening at my doorstep.

    The only reason why I gave this product a rating of 4 stars out of 5 is that it is a bit expensive compared to similar electrical accessories available in the market. However, I believe that the high-quality features and durability of the Series 9 DC917NG make it worth the price.

    Overall, I am very pleased with my purchase of the Honeywell Series 9 DC917NG digital doorbell and would recommend it to anyone looking for a high-quality and reliable doorbell.

Add a review

Your email address will not be published. Required fields are marked *

Frequently Asked Questions:

How do I properly install the Honeywell Series 9 DC917NG vacuum cleaner according to the manufacturer's instructions?

To properly install your new Honeywell Series 9 DC917NG vacuum cleaner, follow these steps based on the manufacturer's instructions:

1. Choose a location for your vacuum cleaner that is easily accessible and close to an electrical outlet. Plug in the power cord and ensure it is securely connected to the wall socket. Remove any packaging materials from the vacuum cleaner and its accessories. Attach the desired accessory to the end of the hose. The vacuum comes with a crevice tool, dusting brush, and upholstery tool that can be easily swapped out by pressing the release button on the side of the wand. Adjust the height settings of the roller brush using the foot pedal located near the bottom of the vacuum cleaner. This will ensure proper suction and prevent damage to carpets or floors. Turn on the vacuum by pressing the power button located on the handle. Use the vacuum cleaner to clean your desired area, using the appropriate attachment for each surface. The DC917NG is equipped with a HEPA filter that captures 99. Once you have completed cleaning, detach the hose from the vacuum cleaner and empty the dirt cup located at the bottom of the unit. Rinse the filter under running water once a month to maintain its effectiveness. Store the vacuum cleaner in a cool, dry place when not in use. Keep it out of reach of children and pets. By following these instructions, you can ensure that your Honeywell Series 9 DC917NG vacuum cleaner is installed properly and performs to the best of its ability.

"How do I properly install the Honeywell Series 9 DC917NG vacuum cleaner?"

To properly install your new Honeywell Series 9 DC917NG vacuum cleaner, follow these steps:

1. Find a suitable location for your vacuum cleaner. The DC917NG comes with a detachable hose and powerhead attachment, so you can store it in an upright position or lay the hose flat on the floor. Plug in the vacuum cleaner to a power outlet that is close to where you plan to use it. Make sure the power cord is not too short, as this could limit your movement when cleaning. Attach the powerhead to the bottom of the vacuum cleaner. The DC917NG comes with a detachable powerhead that allows for easy maneuverability and storage. Securely attach any necessary accessories to the hose or wand, such as the crevice tool, dusting brush, or upholstery attachment. These tools will help you clean different surfaces and hard-to-reach areas. Turn on the vacuum cleaner by pressing the power button. The DC917NG has a digital control panel that allows you to adjust the suction power and select the desired cleaning mode (carpet, bare floor, or auto). Start cleaning! Push the vacuum cleaner forward to move it across your floors or surfaces. Use the accessories to clean tight spaces and corners. When finished cleaning, detach the hose and powerhead from the vacuum cleaner. Store them in a safe place where they will not be damaged or misplaced. Empty the dustbin or bag (depending on your specific model) and dispose of the dirt and debris. Make sure to do this regularly to maintain optimal performance and prevent clogs. Clean any remaining dirt or residue from the vacuum cleaner's brushes, filter, and other components as needed. Follow the manufacturer's instructions for proper maintenance and care. By following these steps, you can ensure that your Honeywell Series 9 DC917NG vacuum cleaner is installed and used properly, helping to extend its lifespan and keep it functioning at peak performance.

How do I properly install the replacement filter on my Honeywell Series 9 DC917NG vacuum cleaner?

To install the replacement filter on your Honeywell Series 9 DC917NG vacuum cleaner, follow these steps:

1. Turn off and unplug the vacuum cleaner to ensure safety during the installation process. Locate the filter housing at the back of the vacuum cleaner. It is a square-shaped compartment with a latch on one side. Press the latch downwards to release the filter housing. Remove the old filter from the filter housing by gripping it firmly and pulling it out. Dispose of the old filter properly. Insert the new replacement filter into the filter housing, ensuring that the arrows on the filter are pointing in the direction of airflow. The filter should fit snugly into the compartment but should not be pressed too hard as this may damage it. Push the filter housing back into place and ensure that it clicks securely into position. Turn on your vacuum cleaner to test if the new filter is working properly. Check for any air leaks or blockages, which could affect the performance of the vacuum cleaner. If you notice any problems, consult the Honeywell user manual or contact customer support for assistance. Remember to replace the filter regularly as recommended by the manufacturer to maintain optimal performance and prevent damage to your vacuum cleaner.

How do I properly install the Honeywell Series 9 DC917NG vacuum cleaner according to the manufacturer's instructions?

Firstly, ensure that the area where you plan to install the vacuum cleaner is clean and free from any obstructions. This will make the installation process easier and safer for you. Next, remove all the packing materials from the vacuum cleaner box and check if all the components are present. Make a note of any missing parts or damaged items that may affect the performance or safety of the machine. Follow the manufacturer's instructions carefully and read them thoroughly before beginning the installation process. This will help you avoid any mistakes and ensure proper installation. Start by attaching the filter to the bottom of the dustbin. The filter helps to trap fine particles and prevent them from being released into the air as the vacuum cleaner operates. Then, connect the dustbin onto the base unit of the vacuum cleaner. Ensure that it is securely fastened and tight enough so that it does not fall off during operation. Attach the power cord to the back of the vacuum cleaner. Make sure the plug fits snugly into an electrical outlet that meets the voltage requirements specified by the manufacturer. Install any additional attachments or tools as per the instructions provided. These attachments may include crevice tools, dusting brushes, and upholstery tools, among others. After all the components are attached, check for any loose connections or wobbling parts. Ensure that they are firmly secured and free from any damage. Finally, run the vacuum cleaner on a low-traffic area to test its functionality before using it on your regular cleaning tasks. This will help you identify any issues with the machine and make necessary adjustments as required. Always follow the manufacturer's recommended maintenance schedule for your Honeywell Series 9 DC917NG vacuum cleaner. Regular servicing and cleaning of the machine will prolong its lifespan and ensure optimal performance.