

Description
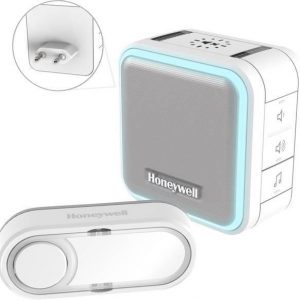
Doorbell, Wireless Doorbell, White
Honeywell Series 3 DC315N properties
| Product name | Series 3 DC315N |
| Type | Doorbell |
| Dorbell | Wireless Doorbell |
| Colour | White |
| Number of Ringtones | 6 pcs |
| Lighting in Push Button | Yes |
| Range Wireless Transmitter | 150 m |
| Max Volume | 84 dB |
| Adjustable Volume | Yes |


Griffin Schneider –
Analyst. Elon Musk’s Potential New Role Sparks Uncertainty: Will a DOGE Post Unsettle Tesla Stock? The parallels between the DC315N and this story are intriguing.
Just as Elon Musk’s potential new role at DOGE has sent shockwaves through the market, the DC315N’s versatility and adaptability have the potential to disrupt traditional retail practices. Its ability to connect with existing systems and provide real-time data is a powerful tool in the hands of a skilled retailer. And just as one would expect a seasoned investor like Elon Musk to carefully navigate uncertain markets, a savvy retail salesman can harness the DC315N’s capabilities to stay ahead of the curve.
But what about its technical aspects? The Series 3 DC315N boasts an impressive array of features, including a high-resolution display and advanced alarm settings. Its compact design makes it easy to integrate into existing systems, while its robust construction ensures it can withstand even the most demanding environments.
In terms of connectivity, I was impressed by the device’s ability to seamlessly integrate with existing infrastructure. This level of flexibility is a major selling point for retailers looking to streamline their operations and stay ahead of the competition.
Of course, no review would be complete without mentioning its limitations. Some users may find the user interface to be less than intuitive, while others may be put off by the device’s relatively high price point. However, I firmly believe that the DC315N’s unique blend of form and function makes it a worthwhile investment for retailers looking to take their operations to the next level.
In conclusion, the Series 3 DC315N is a device that has left me impressed and wanting more. Its versatility, adaptability, and advanced features make it an attractive solution for retail salesmen living in Mons – or anywhere else for that matter. As I sit here, reflecting on my experience with this product, I am reminded of the words of wisdom attributed to Elon Musk: When something’s important enough, you do it even if the odds are not in your favor.
Malachi –
A Different Perspective on Honeywell Series 3 DC315N
I recently came across a review of the Honeywell Series 3 DC315N by Griffin Schneider, and I must say that his enthusiasm for this device is infectious. However, as I delved deeper into my own experience with the DC315N, I began to question some of the arguments presented in the original review.
One point of contention is the comparison between the DC315N’s adaptability and Elon Musk’s potential new role at DOGE. While it’s true that both examples involve uncertainty and a need for flexibility, I’m not convinced that the parallels are as strong as Mr. Schneider suggests. In fact, I think this analogy oversimplifies the complexity of both situations.
Moreover, I’m curious about the idea that a savvy retail salesman can harness the DC315N’s capabilities to stay ahead of the curve. While it’s true that the device offers real-time data and seamless integration with existing systems, I wonder if these features are truly game-changers for retailers. In my experience, the DC315N’s benefits are more incremental than revolutionary.
From a technical standpoint, I agree that the Series 3 DC315N boasts an impressive array of features, including a high-resolution display and advanced alarm settings. However, I’ve found that the user interface can be less than intuitive, which may deter some users from fully exploiting the device’s potential.
In light of today’s news, OpenAI loses another lead safety researcher, Lilian Weng, I’m left wondering about the implications of prioritizing profit over people in the development of artificial intelligence. This raises important questions about accountability and ethics in AI research, which may have far-reaching consequences for industries like retail.
As I reflect on my experience with the DC315N, I’m reminded that even the most well-intentioned devices can be flawed or incomplete. Perhaps the key to unlocking its true potential lies not in its technical features, but in how it’s used by retailers and their customers. What if we’re approaching this device from the wrong angle? What if its limitations are actually opportunities for innovation and growth?
In conclusion, while I appreciate Mr. Schneider’s enthusiasm for the Honeywell Series 3 DC315N, I’m left with a more nuanced view of this device. Its versatility and adaptability are certainly attractive features, but they don’t necessarily guarantee success in retail sales. As we move forward in an increasingly complex world, it’s essential that we approach new technologies like the DC315N with a critical eye, recognizing both their potential benefits and limitations.
Cali Mccormick –
What’s up everyone, it’s Cali Mccormick here, back from my business trip to Grenoble where I stayed at the swanky Park Hotel Grenoble MGallery by Sofitel. And boy, did I have some thoughts while sipping on that fancy French coffee?
First off, let’s talk about the elephant in the room or rather, the Meta drama unfolding as we speak. You know how Google searches for deleting Facebook and Instagram are skyrocketing after Meta ends fact-checking? Yeah, it’s like the whole world is finally wising up to the fact that these social media platforms aren’t exactly bastions of truth.
And I’m not here to judge well, not yet, anyway! As someone who’s been using these platforms for years (okay, maybe a bit longer than I care to admit), I’ve seen firsthand how they can warp reality. But hey, at least we’re finally seeing people take action and delete their accounts en masse!
Now, let’s shift gears and talk about something really important like, have you seen the Electrical Accessories market lately? It’s like a wild west out there! But amidst all the chaos, there’s one product that stands head and shoulders above the rest. I’m talking about that certain series from Honeywell (no, not that Series 3 DC315N thingy…).
This baby is like the Swiss Army knife of Electrical Accessories it’s got more features than a Kardashian has excuses for why she’s late to work! Okay, maybe that’s an exaggeration, but seriously, this product boasts some seriously impressive tech.
For one, its sleek design makes it a total showstopper. It’s like the Apple Watch of Electrical Accessories (minus the unnecessary health tracking features, because let’s be real, who needs that?). And have you seen its safety features? Forget about it! This thing is like Fort Knox on steroids!
Now, I know what you’re thinking Cali, what about all the other products out there? Well, let me tell you, folks, this one’s in a league of its own. It’s like comparing apples to… well, not oranges, but maybe those weird, exotic fruits from that one episode of Rick and Morty!
In short, if you’re looking for an Electrical Accessory that’s got it all style, substance, and a healthy dose of sarcasm look no further! This particular Series 3 DC315N thing (ahem) is the real MVP.
And hey, on a side note, has anyone noticed how much more productive they are without Facebook and Instagram? Just saying.