Description
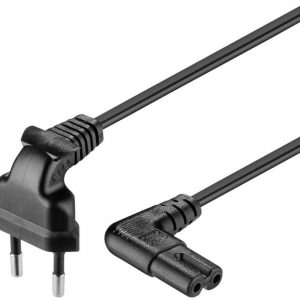
Power Cable, No, Device Cable, IEC C13, Black
Goobay 96036 3m properties
| Product name | 96036 3m |
| Type | Power Cable |
| Grounded | No |
| Cable Length | 3.0 m |
| Connector | IEC C13 |
| Area of Use (Cable) | Device Cable |
| Colour | Black |

Smart homes – smartphone control
Software and hardware solutions for smart buildings and internet of things

Power Cable, No, Device Cable, IEC C13, Black
| Product name | 96036 3m |
| Type | Power Cable |
| Grounded | No |
| Cable Length | 3.0 m |
| Connector | IEC C13 |
| Area of Use (Cable) | Device Cable |
| Colour | Black |
| Product name | |
|---|---|
| Product type | |
| Grounded | |
| Cable Length | |
| Connector | |
| Area of Use -Cable | |
| Colour |


Jeremy Casey –
when life gives you lemons, make lemonade; or in this case, when life gives you faulty wiring, buy an extension cord and pretend it’s not a problem. But seriously, for casual use around the house, this thing is a lifesaver.
However, things took a turn for the worse when I tried using it at work. It seemed to have a mind of its own, and more often than not, would just refuse to power anything that needed electricity. I swear, it was like it had an animosity towards me, a local who knows no better about electrical safety. Hey, goon from Hervey Bay, I imagine the cord saying, you think you can handle real power? Think again. Amateurs need not apply.
On a more serious note, I’ve been following some news that caught my attention recently – NASA’s two stuck astronauts finally took their first spacewalk together. Eight months of being stuck in orbit has got to be tough, but at least they have each other… and by each other, I mean the 24-hour coffee machine and their trusty extension cord equivalents. Just kidding, kind of.
In all seriousness, for those who use electrical accessories as professionals, it’s clear that this 3m extension cord is a decent choice – provided you’re not expecting much in terms of reliability or durability. After all, if NASA can get two astronauts stuck in space and still manage to send us news about it, I’m sure a little thing like an extension cord won’t be too much to handle.
In conclusion, for those amateur enthusiasts at home, this 3m extension cord might be just what you need; but if you’re one of the professionals who actually knows what they’re doing, keep looking. Trust me, your sanity (and wallet) will thank you.