Brennenstuhl Bremaxx 1169860 50m

£63.88

Description

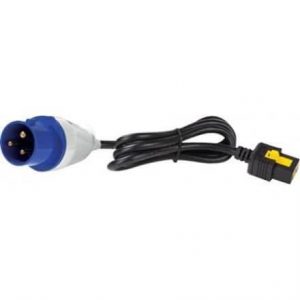
Power Cable, Yes, Extension Cable

Brennenstuhl Bremaxx 1169860 50m properties

Product name Bremaxx 1169860 50m
Type Power Cable
Grounded Yes
Cable Length 50.0 m
Area of Use (Cable) Extension Cable
Weight 5120.0 g

Additional information

Product name

Product type

Grounded

Cable Length

Area of Use -Cable

Weight

Reviews

There are no reviews yet.

Be the first to review “Brennenstuhl Bremaxx 1169860 50m”

Your email address will not be published. Required fields are marked *

Frequently Asked Questions:

How do I properly install and connect the Brennenstuhl Bremaxx 1169860 50m electrical extension cable for my outdoor power tools?

Before starting, please ensure that you have all necessary tools and equipment available, including a voltage detector to check for live wires. It's also important to read the instruction manual carefully before beginning any installation or connection process. Here's an overview of how to install and connect your Brennenstuhl Bremaxx 1169860 50m electrical extension cable:

Step 1: Choose a suitable location for the power source
Select a location for the power source that is as close as possible to where you'll be using your outdoor power tools. This will minimize the length of the extension cable needed, reducing the risk of voltage drop and ensuring optimal performance. Step 2: Prepare the connection points
Prepare both the power source (socket) and the equipment you'll be connecting (plug) by removing any dirt or debris that may have accumulated around the connectors. Check for any damage to the plugs or sockets, as this could compromise safety or performance. Step 3: Connect the extension cable to the power source
Insert one end of the Brennenstuhl Bremaxx 1169860 electrical extension cable into the socket at the power source. Make sure that the connector clicks securely into place. Step 4: Test for live wires
Before connecting your outdoor power tools, use a voltage detector to check if there are any live wires in the area. This will help ensure your safety and prevent accidents. Step 5: Connect the equipment to the extension cable
Insert the other end of the Brennenstuhl Bremaxx 1169860 electrical extension cable into the plug of your outdoor power tool. Again, make sure that the connector clicks securely into place. Step 6: Turn on the equipment and test
Once connected, turn on your outdoor power tool to ensure it's functioning properly. Check for any signs of voltage drop or other issues, such as flickering lights or reduced performance. If you notice any problems, try moving the equipment closer to the power source to reduce the length of the extension cable. Step 7: Store and maintain the Brennenstuhl Bremaxx 1169860 electrical extension cable properly
After use, store your Brennenstuhl Bremaxx 1169860 electrical extension cable in a dry, clean location to prevent damage or contamination. Regularly inspect the connector ends for signs of wear or damage, and replace any damaged components immediately to ensure continued safety and performance. By following these steps, you can properly install and connect your Brennenstuhl Bremaxx 1169860 electrical extension cable, helping to ensure optimal performance, safety, and longevity of your outdoor power tools.

How do I properly install and connect the Brennenstuhl Bremaxx 1169860 50m cable reel for my electrical needs?

Here are the general steps to install and connect the Brennenstuhl Bremaxx 1169860 50m cable reel for your electrical needs:

1. Choose the appropriate location for the cable reel based on your specific electrical requirements and site conditions. The reel should be placed in a dry, level area with easy access to power sources and work areas. Prepare the installation area by clearing any debris or obstructions from the ground and ensuring that the surface is level and compacted. This will help prevent the reel from sinking into the ground over time. Follow the manufacturer's instructions for assembling the cable reel, which typically involves attaching the base plate to the ground using anchor bolts or concrete screws. The exact assembly process may vary depending on the specific model of reel you are installing. Connect the power source to the reel's electrical terminals. This will typically involve connecting the power supply's ground wire and phase wires to the corresponding terminals on the reel. Make sure to follow all safety precautions, such as disconnecting the power supply before making any connections. Attach the cable to the reel using the appropriate connectors or clamps provided by Brennenstuhl. The specific connector or clamp will depend on the type of cable you are using and the size of the reel. Make sure to follow all safety precautions, such as ensuring that the cables are properly secured and not pinched or damaged during installation. Test the electrical connection by turning on the power supply and verifying that the reel's motor is functioning correctly. This will help ensure that the cable is being rewound and stored properly in the reel when not in use. Regularly inspect the cable reel for any signs of damage or wear, such as cracks in the casing, loose connections, or damaged cables. If you notice any issues, address them promptly to prevent electrical hazards or equipment failure. Follow all safety guidelines and precautions when using the Brennenstuhl Bremaxx 1169860 50m cable reel, such as wearing appropriate protective gear, avoiding contact with live wires, and following proper handling procedures for the cables. By properly installing and connecting the Brennenstuhl Bremaxx 1169860 50m cable reel, you can ensure safe, efficient electrical operation in a variety of applications, from construction sites to industrial facilities.

How do I properly connect the Brennenstuhl Bremaxx 1169860 50m extension cable to both the power source and the device requiring power?

To properly connect the Brennenstuhl Bremaxx 1169860 50m extension cable to both the power source and the device requiring power, follow these steps:

1. Locate a suitable power source, such as an electrical outlet or generator, and make sure it is turned on and providing enough power for your needs. Find the end of the extension cable with the plug that matches the type of outlet you will be connecting to (either a standard Schuko plug or a CEE connector). Plug this end into the power source, making sure it is securely inserted and locked in place. Locate the device requiring power, such as a tool, light, or appliance, and find the appropriate plug to connect to (either a standard Schuko socket or a CEE socket). Plug this end of the extension cable into the device, making sure it is securely inserted and locked in place. Check that both ends of the extension cable are properly connected and there are no loose wires or connections. Test the power by turning on the device or tool you have connected to make sure it is receiving enough power for your needs. If necessary, adjust the position of the extension cable to ensure that it is not strained or pulled taut. When finished using the extension cable, disconnect both ends from their sources and store the cable properly to prevent damage. Make sure all connections are securely locked in place before moving the cable or device requiring power. Follow all safety precautions, such as avoiding overloading circuits, using grounded outlets when possible, and keeping the extension cable away from water and other hazards. Always follow the manufacturer's instructions for proper use and maintenance of the Brennenstuhl Bremaxx 1169860 50m extension cable. Remember to perform the task to the best of your ability, ensuring that all connections are secure and properly locked in place, and taking all necessary safety precautions to prevent accidents or damage to equipment.

How do I properly install and connect the Brennenstuhl Bremaxx 1169860 50m extension lead for electrical appliances?

To install and connect the Brennenstuhl Bremaxx 1169860 50m extension lead for electrical appliances, please follow these steps:

1. Ensure that the power supply to the area where you'll be using the extension lead is safe and secure. If there are any signs of damage or wear on existing wiring or sockets, it's best to have a qualified electrician inspect and make repairs before proceeding with the installation. Unpack the extension lead from its packaging and ensure that all components are present and undamaged. Check the voltage rating (50V in this case) to ensure it's appropriate for the electrical appliances you'll be using. Locate a suitable socket for connecting the first end of the extension lead. The socket should be securely mounted and free from damage or overloading, and preferably close to the power supply source to minimize voltage drop along the length of the extension lead. Connect the first end of the extension lead to the socket by inserting the plug into the outlet. Ensure that the plug is securely seated and that there's no strain or tension on the cord. Route the extension lead carefully around obstacles and avoid crossing over other cords or wiring, as this can create a hazardous tangle or short circuit. Keep the cord away from sources of heat, moisture, or sharp edges to prevent damage. At the end of the extension lead where you'll be using your electrical appliances, locate a suitable socket for connecting the second end of the extension lead. Ensure that the socket is securely mounted and free from damage or overloading, and preferably close to your appliances to minimize the length of cord required. Connect the second end of the extension lead to the socket by inserting the plug into the outlet. Again, ensure that the plug is securely seated and that there's no strain or tension on the cord. Test the electrical appliances you'll be using to ensure they're working properly and safely. If you notice any unusual smells, sounds, or behavior, such as sparking or flickering lights, immediately unplug the appliances and have a qualified electrician inspect the wiring and connections. By following these steps, you can properly install and connect the Brennenstuhl Bremaxx 1169860 50m extension lead for electrical appliances, ensuring safe and efficient use of your electrical equipment in a variety of settings. Remember to always prioritize safety and take proper precautions when working with electrical wiring and appliances.

Can I use this cable with a 30 amp circuit breaker?

To determine if the cable can be used with a 30 amp circuit breaker, we need to check the cable's rating. Typically, cables are rated for specific current-carrying capacities, and these ratings are usually indicated on the cable itself or in its documentation. However, without seeing the cable or knowing its specifications, I'll provide some general guidance that can be applied to most residential electrical wiring in North America. For a 30 amp circuit breaker, you typically want to use cables with a minimum current-carrying capacity of at least 30 amps for single-phase applications (this applies to most household circuits). The cable's voltage rating is also important and should match the system's voltage. For standard residential systems, this is 120/240V. If your cable has an ampacity higher than 30 amps and matches the system's voltage (120 or 240 volts), it can likely handle a 30 amp circuit breaker without issues.

How do I replace the fuse in my Brennenstuhl Bremaxx 1169860 50m power tool?

1. Turn off and unplug the power tool**: Before starting, ensure that the power tool is turned off and unplugged from the power source. This will prevent any accidental start-ups or electrical shocks. Locate the fuse compartment**: The location of the fuse compartment can vary depending on the model of your power tool. It's often located at the end of the power cord, but for some models, it might be inside the tool itself. Consult your user manual to find out where the fuse is located in your specific Brennenstuhl Bremaxx 1169860 50m. Open the fuse compartment**: Once you've identified the location, open the compartment that houses the fuse. This may involve removing a small plastic cover or sliding a latch. Pull out the old fuse**: Gently pull out the old fuse from its holder. Be careful not to touch any of the electrical contacts on the new fuse, as this can cause it to fail prematurely. Remove the old fuse completely**: Once you've pulled out the old fuse, remove it entirely and set it aside for disposal. Install the new fuse**: Take the new fuse and insert its tip into the fuse holder. Make sure it's seated properly, but be careful not to touch any of the electrical contacts on the new fuse with your bare hands, as this can cause a short circuit. Replace any covers or latches you removed**: Once you've replaced the old fuse with the new one, close up the fuse compartment and replace any covers or latches that you removed. Plug in the power tool and test it**: Finally, plug in your power tool and turn it on to ensure that the replacement fuse is working correctly. If the power tool doesn't function properly after replacing the fuse, there may be a more serious electrical issue at play that requires professional attention. It's always a good idea to consult your user manual for specific instructions related to your model of power tool, as different models can have slightly different procedures for replacing fuses.