Brennenstuhl 1508642 1-way
£7.46
Description
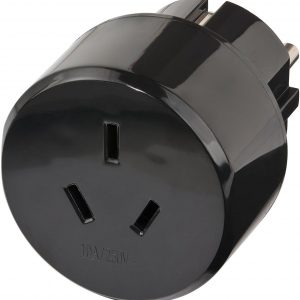
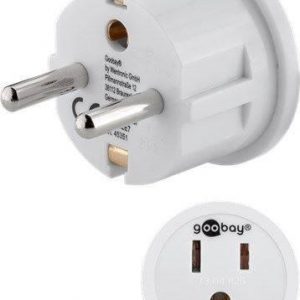
Adapter, No, Travel Adapter, Black
Brennenstuhl 1508642 1-way properties
Product name | 1508642 1-way |
Type | Adapter |
Adapter | Travel Adapter |
USB-outlet | No |
Grounded | No |
Number of USB-outlets | 0 |
Colour | Black |
Height | 8.0 cm |
Width | 4.7 cm |
Depth | 4.2 cm |
Weight | 52.0 g |
Frequently Asked Questions:
How do I properly install the Brennenstuhl 1508642 1-way electrical accessory in my electrical system?
Here are the general steps for installing a Brennenstuhl 1508642 1-way electrical accessory:
1. Gather all necessary tools and materials, including a voltage tester, screwdrivers, wire nuts, and electrical tape. Make sure you have enough length of wiring to reach from the existing junction box to the new Brennenstuhl accessory. Turn off power to the electrical system at the main circuit breaker or fuse box. Test the wires with a voltage tester to make sure there is no live current running through them. Remove the cover plate from the existing junction box using a screwdriver. Carefully extract any wiring connections and wire nuts inside the junction box. Mount the Brennenstuhl 1508642 accessory onto the electrical box using the included mounting hardware. Make sure it is securely fixed in place. Connect the wires from your electrical system to the Brennenstuhl accessory's terminals. Follow these steps:
a) Identify which wire is connected to the hot terminal (usually black or red). Strip the ends of both wires and twist them together, leaving about ¼ inch exposed at each end. Apply a small amount of electrical tape around the twisted wires to secure them in place. Insert the wires into the corresponding terminal screws on the Brennenstuhl accessory. Make sure they are securely fastened, but do not over-tighten as this may cause damage to the wires or terminal screws. Connect the neutral wire (usually white) from your electrical system to the neutral terminal on the Brennenstuhl accessory. This should be a direct connection with no need for twisting or taping. If you are installing an outlet, attach the provided cover plate onto the Brennenstuhl accessory. Ensure that it is firmly fastened to prevent accidental detachment. Test the electrical system by turning on power at the main circuit breaker or fuse box. Confirm that the Brennenstuhl accessory is working properly and there are no electrical shorts or issues with the wiring connections. Finally, securely fasten the cover plate to the existing junction box using the screws provided. This will prevent accidental contact with live current and protect the Brennenstuhl accessory from damage.
How do I properly install and use the Brennenstuhl 1508642 1-way electrical accessory?
To install and use the Brennenstuhl 1508642 1-way electrical accessory, follow these steps:
1. Ensure that the power supply is turned off before starting the installation process. Identify a suitable location for the accessory. The location should be close to the power source and easy to reach. Clean the area where the accessory will be mounted using a dry cloth or brush. Make sure there is no dirt, dust or debris on the surface. Apply a small amount of sealant around the perimeter of the mounting hole to ensure a watertight seal. Insert the screws into the mounting plate and secure it to the wall using a screwdriver. Ensure that the accessory is level and properly aligned. Connect the electrical wiring to the terminal block according to the instructions provided. Make sure that the wires are properly stripped and connected securely. Test the accessory to ensure that it is functioning correctly. Turn on the power supply and check that the light or other electrical appliance is working as expected. If necessary, adjust the position of the accessory to suit your needs. The Brennenstuhl 1508642 1-way electrical accessory can be rotated up to 360 degrees for maximum flexibility and convenience. Clean the accessory regularly using a soft cloth or brush to remove dirt, dust and debris. This will help to maintain its performance and prolong its lifespan. Inspect the accessory periodically to ensure that it is still securely mounted and functioning correctly. If any issues are detected, address them promptly to prevent further damage or hazards.
Reviews
There are no reviews yet.