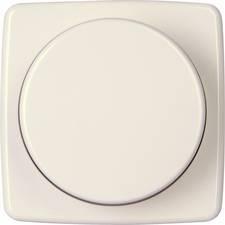
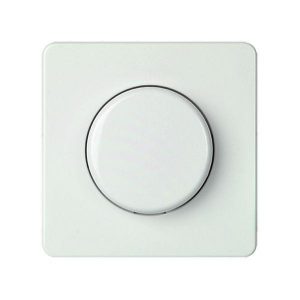
REV 0399620090 Dimmer

£18.25

SKU: 10175274 Category: Tags: , , , ,

Description

Dimmer, Led, Halogen, Incandescent, White

REV 0399620090 Dimmer properties

Product name0399620090 Dimmer
TypeDimmer
Suitable for lamp typeHalogen, Incandescent, Led
Max Load Led100 W
Min Load Led5 W
Max Load halogen300 W
Min Load halogen20 W
Voltage230 V
ColourWhite

Additional information

Product name

Product type

Suitable for lamp type

, ,

Max Load Led

Min Load Led

Max Load halogen

Min Load halogen

Voltage

Colour

Reviews

There are no reviews yet.

Be the first to review “REV 0399620090 Dimmer”

Your email address will not be published. Required fields are marked *

Frequently Asked Questions:

How do I set up and use the REV 0399620090 Dimmer for the first time?

To set up and use the REV 0399620090 Dimmer for the first time, follow these steps:

1. Installation:
- Connect the dimmer to your electrical circuit by wiring it in place of a standard light switch. Make sure to connect the wires correctly: Line (L) to Line (L), Load (Ld) to Load (Ld), Neutral (N) to Neutral (N).
- Securely fasten the dimmer onto the electrical box with screws or clips.

2. Setting Up the Dimmer:
- Turn off the circuit breaker for safety.
- Connect the load wires from the fixture to the corresponding terminals on the dimmer. Ensure proper polarity: black wire to terminal marked "Ld (N)" and white wire to terminal marked "Ld (C)".
- Reconnect the neutral wire to the green or bare copper grounding screw.
- Turn on the circuit breaker and test the dimmer by turning it on and off at the dimmer switch. Make sure that the fixture is receiving power and the bulbs are working correctly.

3. Adjusting Brightness:
- To adjust the brightness, rotate the dial clockwise to increase brightness and counterclockwise to decrease it. The dimmer should be able to control the brightness of incandescent, LED, or halogen bulbs as long as their maximum wattage is within the specified range for the dimmer (usually 600W).

4. Setting the Minimum and Maximum Brightness:
- To set the minimum brightness level, turn on the dimmer and rotate it clockwise until you reach the desired level. Then, press and hold the dimmer switch for about three seconds until you hear a "click" sound. This sets the minimum brightness level.
- To set the maximum brightness level, follow a similar process, but turn off the dimmer first and rotate it counterclockwise to your desired maximum brightness level. Press and hold the switch until you hear a "click" sound.

5. Resetting the Dimmer:
- If you need to reset the dimmer, turn off the power at the circuit breaker, unplug the dimmer or disconnect it from the electrical box, and repeat steps 2-4. This will restore the dimmer to its factory settings.

How do I properly install the REV 0399620090 Dimmer to replace an existing dimmer switch in my home?

First, turn off power to the circuit that you will be working on at the main electrical panel. Test the circuit with a voltage tester to ensure no power is flowing. Remove the cover plate and the existing dimmer switch from the wall. Unscrew any screws holding the switch in place and carefully pull it out of the wall. Disconnect the wires from the old dimmer by gently pulling them out of their respective terminals. Take note of which wire is connected to which terminal, as you will need to connect them similarly to the REV 0399620090 Dimmer. Connect the wiring from the REV 0399620090 Dimmer according to the manufacturer's instructions. Generally, the black wire should be connected to the terminal labeled "black" or "hot," the white wire should go to the neutral (silver) terminal, and the green wire (if present) should connect to the grounding screw or terminal. Secure the REV 0399620090 Dimmer in place using the mounting brackets provided. Tighten all screws securely. Attach the cover plate over the new dimmer switch, being careful not to damage any of the wires or connections inside. Secure the cover plate with screws and tighten them firmly. Turn the power back on at the electrical panel and test the new dimmer switch by switching it on and off and adjusting the dimming level as desired. If necessary, consult the manufacturer's instructions for specific installation requirements or troubleshooting tips.

How do I properly install and program the REV 0399620090 Dimmer to control my lighting system?

To properly install and program the REV 0399620090 Dimmer, please follow these steps:

1. Gather Materials: Before starting the installation process, ensure that you have all necessary materials. This includes a screwdriver, wire cutters/strippers, wire nuts, electrical tape, and the REV 0399620090 Dimmer. Turn off Power: To avoid electric shock, it’s crucial to turn off power to the circuit you’re working on. This can be done by switching off the corresponding breaker or removing the fuse from the electrical panel. Wiring Preparation: Remove the old dimmer and prepare the wires for connection. Use wire cutters/strippers to strip about 1 inch of insulation from the ends of the wires. Ensure that the stripping is clean and straight. Connecting the Wires: Connect the wires to the corresponding terminals on the REV 0399620090 Dimmer. The black wire should be connected to the terminal marked ‘Load’, the white wire goes to the terminal labeled ‘Neutral’, and the green or bare copper wire goes to the grounding screw. Attach Dimmer: Once you’ve connected all the wires, securely attach the REV 0399620090 Dimmer to the electrical box using mounting screws. Turn on Power and Test: After attaching the dimmer, turn on the power at the circuit breaker or replace the fuse in the electrical panel. Now, test the dimmer to ensure that it's working properly by adjusting the brightness level using the dimming switch. Programming: The REV 0399620090 Dimmer has several programming options depending on your desired setup. Refer to the manufacturer’s user manual for detailed instructions on how to program the dimmer according to your specific requirements. Final Checks: Before closing the electrical box, conduct final checks to ensure that all wires are securely connected and not pinched or damaged. Additionally, test the dimmer again to confirm its functionality. Remember to always follow safety precautions when working with electricity and consult a licensed electrician if you're unsure about any part of the installation process.