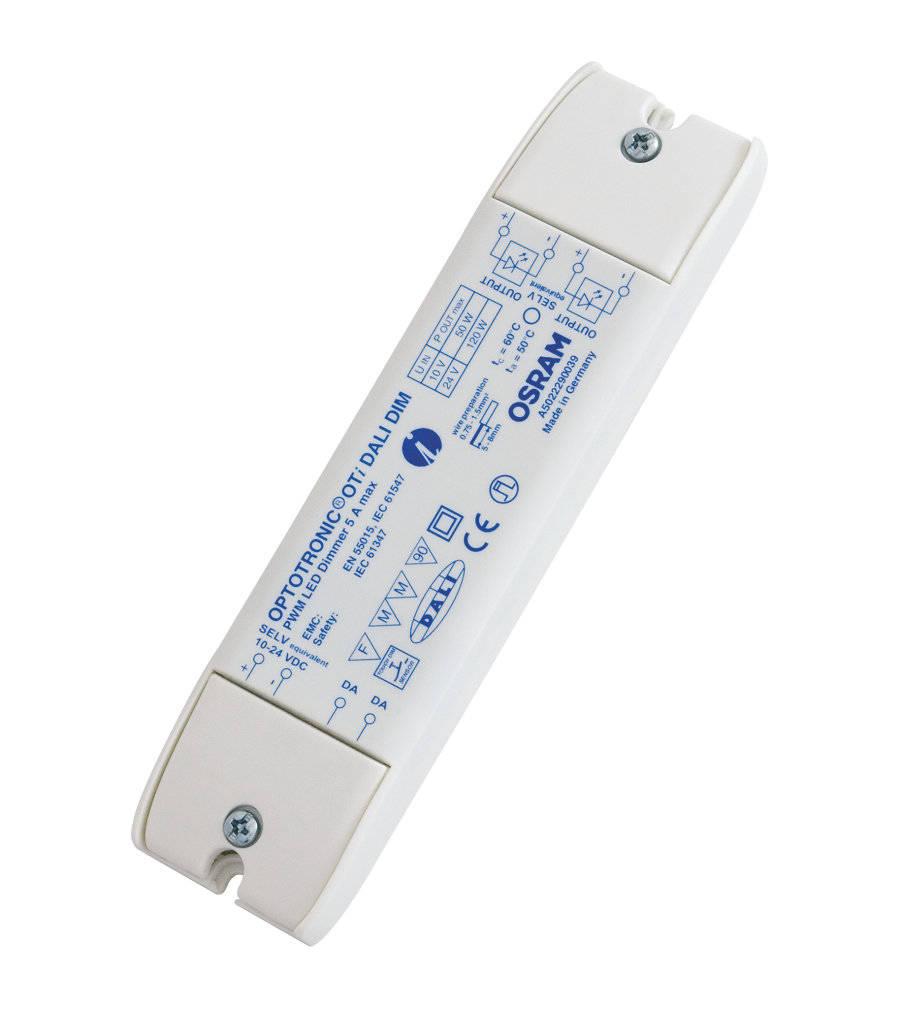
Osram OTi DALI DIM

£44.80

Description

Dimmer, Transformer, Indoor, Led, IP 20, White

Osram OTi DALI DIM properties

Product nameOTi DALI DIM
TypeDimmer
DimmerTransformer
Suitable for lamp typeLed
Area of UseIndoor
Voltage24 V
IP ClassificationIP 20
ColourWhite
Height2.0 cm
Width4.2 cm
Depth17.2 cm
Weight75.0 g

Additional information

Product name

Product type

Dimmer

Suitable for lamp type

Area of Use

Voltage

IP Classification

Colour

Height

Width

Depth

Weight

Reviews

There are no reviews yet.

Be the first to review “Osram OTi DALI DIM”

Your email address will not be published. Required fields are marked *

Frequently Asked Questions:

What is the difference between Osram OTI DA-LI DIM and standard Osram DALI dimmers, and how do I set up an Osram OTI DA-LI DIM system?

Osram OTI DA-LI DIMS are a type of digital addressable lighting interface (DALI) dimmer specifically designed for use with OSRAM's OptoTrain Intelligent (OTI) system. The main difference between OTI DA-LI DIMS and standard Osram DALI dimmers is that the OTI DA-LI DIMS are programmable and can be integrated into a broader lighting management system, while standard DALI dimmers typically have fixed functionality.

Here's how to set up an Osram OTI DA-LI DIMS system:

1. Gather your components: You will need the Osram OTI DA-LI DIMS themselves, compatible LED lights or lamps, a DALI power supply, and an appropriate DALI gateway. The gateway is used to connect the system to a lighting management network such as BACnet or Modbus.

2. Install the dimmer modules: Mount the OTI DA-LI DIMS near your light fixtures or in a location where they can communicate with the lights via DALI wiring.

3. Connect the DALI power supply: Attach the DALI power supply to the OTI DA-LI DIMS using the provided cable and connect it to a power source.

4. Connect the LED lights or lamps: Connect each light fixture or lamp to an individual dimmer module using the appropriate wiring and connector.

5. Set up the lighting management network: Configure your selected DALI gateway according to the manufacturer's instructions and connect it to the OTI DA-LI DIMS via Ethernet cable.

6. Program the system: Use Osram's OptoTrain software or a compatible third-party software to program the desired lighting scenarios, dimming levels, and schedules for your lighting system. This can be done through the gateway using either a wired connection or remotely via an internet connection.

7. Test and adjust: Once everything is connected and programmed, test each light fixture or lamp to ensure they are functioning as intended. Adjust any settings as necessary until you achieve your desired lighting environment.

"How do I properly install and configure an Osram OTi DALI dimmer for my lighting system?"

Gather all necessary materials, including the Osram OTi DALI dimmer, a DALI bus cable (if not already installed), screws or mounting brackets, and a voltage tester. Turn off power to the lighting circuit at the main electrical panel. Locate an appropriate location for the dimmer. It should be close to the DALI bus terminal or the first DALI input device on the bus. Make sure it is easily accessible for wiring and operation. Remove the cover plate from the dimmer and identify the input terminals (A, B, C) and output terminal (D). If the dimmer has a DALI input terminal (E), connect it to the corresponding DALI bus cable. Connect the input wires (A and B) to the appropriate terminals on the dimmer. If the circuit is three-phase, connect C to the common terminal. If it's single-phase, leave C disconnected. Mount the dimmer securely using screws or brackets. Make sure it's level and aligned with the electrical box. Connect the output wire (D) to the corresponding wires at each lighting fixture in the circuit. Use wire connectors for a secure connection. If the dimmer has a DALI input terminal, connect it to the DALI bus cable using a DALI connector. Make sure the bus voltage is within the operating range (usually between 12 and 48 VDC). Turn on power at the electrical panel and test the dimmer with a voltage tester. Verify that the input wires are receiving power and the output wires are functioning properly. Adjust the brightness of each lighting fixture as desired using the dimmer controls. Label the dimmer and all connections for future reference. Store any extra materials in a safe place. Conduct regular maintenance on the dimmer and lighting system to ensure proper operation and safety. Follow manufacturer's recommendations for cleaning, lubrication, and replacement of components as needed.