Byron B401E

£11.61

Description

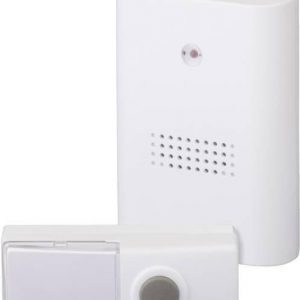
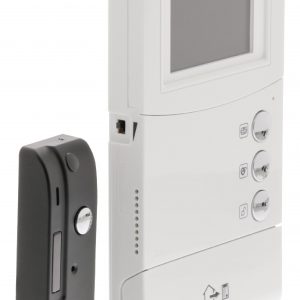
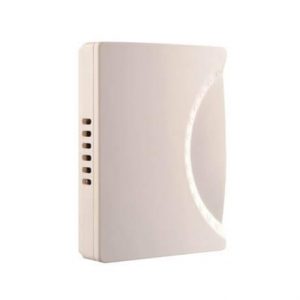
Doorbell, Push Button, Wireless Doorbell, White, Nameplate

Byron B401E properties

Product nameB401E
TypeDoorbell
DorbellPush Button, Wireless Doorbell
ColourWhite
Number of Ringtones4 pcs
Lighting in Push ButtonYes
NameplateYes
Range Wireless Transmitter75 m

Additional information

Product name

Product type

Dorbell

,

Colour

Number of Ringtones

Lighting in Push Button

Nameplate

Range Wireless Transmitter

Reviews

There are no reviews yet.

Be the first to review “Byron B401E”

Your email address will not be published. Required fields are marked *

Frequently Asked Questions:

What is the maximum amperage rating for the Byron B401E plug and socket set?

The maximum amperage rating for the Byron B401E plug and socket set is 16A.

How do I properly install the Byron B401E electrical accessory in my car's dashboard, and what tools are required for this task?

To properly install the Byron B401E electrical accessory in your car's dashboard, follow these steps:

1. Gather the necessary tools and materials:
- The Byron B401E electrical accessory
- A screwdriver (Phillips or flathead)
- Wire strippers
- Electrical tape
- Optional: a wire harness adapter (if your car's wiring system requires one)

2. Locate the appropriate spot on your dashboard for the accessory. This may involve removing any existing accessories to make room. Use the screwdriver to remove any screws or clips holding the dashboard panel in place. Depending on your car's design, this could involve removing the entire instrument cluster or just a small section of the dash. Once you have access to the wiring harness, follow these steps:
- Locate the appropriate wires for power (usually labeled as "ignition" or "accessory") and ground (often labeled as "chassis")
- Using wire strippers, strip a small section of insulation from the end of each wire to expose the copper strands inside
- Connect the power wire from your car's wiring harness to the positive terminal on the Byron B401E accessory (usually labeled as "Power")
- Connect the ground wire from your car's wiring harness to the negative terminal on the Byron B401E accessory (usually labeled as "Ground")
- Use electrical tape to secure any loose connections and prevent shorts

5. Mount the Byron B401E accessory in the desired location, making sure it is secured firmly and does not obstruct any other components. Test the accessory to ensure it is functioning properly. If necessary, adjust the placement or wiring connections until you achieve the desired result. Replace any removed panels or screws, ensuring a tight fit to prevent rattling or interference with other components. Remember to always follow your car's manufacturer recommendations for installation and use of electrical accessories, as improper installation can lead to damage to the accessory, wiring harness, or other components. If you are unsure about any aspect of the installation process, it is recommended that you consult a qualified automotive technician for assistance.

How do I properly install the electrical outlet cover plate on the Byron B401E?

To install the electrical outlet cover plate on the Byron B401E, follow these steps:

1. Turn off power to the electrical outlet by flipping the circuit breaker switch or removing the fuse. Remove the old outlet cover plate by gently pulling it straight out of the electrical box. If it doesn't come out easily, check for any screws or clips holding it in place and remove them before attempting to pull the cover plate out. Clean the electrical box with a damp cloth to ensure that there are no dirt or debris that could interfere with the installation of the new cover plate. Align the Byron B401E cover plate with the electrical box, making sure that the screw holes match up properly. If necessary, use a screwdriver to gently bend the cover plate tabs until they fit snugly into the electrical box slots. Insert the screws provided with the Byron B401E into the cover plate and tighten them firmly using a screwdriver. Make sure that the screws are not overtightened, as this could damage the cover plate or strip the threads in the electrical box. Turn on power to the electrical outlet and test the new cover plate to ensure that it is functioning properly. If everything appears to be working correctly, you can consider the installation complete.

How do I properly install and connect the wiring for the Byron B401E accessory in my vehicle?

Here is a general guide on how to install and connect the wiring for the Byron B401E accessory in your vehicle. However, it's always recommended that you refer to the specific instructions provided by the manufacturer of your vehicle and the Byron B401E accessory for detailed and accurate information based on your particular model and year:

1. Gather your tools: You will need a set of wire connectors, wire cutters, and a voltage meter. Identify the wiring locations: Refer to the owner's manual or diagrams provided by the manufacturer of the Byron B401E accessory to locate the wiring connections in your vehicle. Typically, there will be one connection for power (usually 12 volts), and another for ground. Disconnect the battery: Before working on electrical systems in your vehicle, it's always recommended that you disconnect the battery to prevent any accidental shorts or damage. Prepare the wiring: Cut the appropriate length of wire (usually around 12-18 inches) and strip about ¼ inch from each end using wire cutters. Make sure the strips are clean and free of any insulation. Connect the power wire: Locate the positive terminal for power in your vehicle's electrical system, usually near the battery or fuse box. Attach one end of the power wire to this terminal using a connector. The other end should be connected to the corresponding terminal on the Byron B401E accessory. Connect the ground wire: Locate a suitable grounding point in your vehicle, such as a metal bracket or bolt near the battery or chassis. Attach one end of the ground wire to this point using a connector. The other end should be connected to the corresponding terminal on the Byron B401E accessory. Test for proper connection: Use a voltage meter to check that there is power present at the terminals you have connected. Make sure the connections are secure and properly tightened. Reconnect the battery: Once you have confirmed that the connections are correct, reconnect the battery and start your vehicle to test the Byron B401E accessory. Remember to always follow proper safety protocols when working with electrical systems in your vehicle, such as wearing appropriate protective gear and disconnecting the battery before beginning any work. If you encounter any difficulties or have concerns about the installation process, consult the instructions provided by the manufacturer of your vehicle and the Byron B401E accessory, or seek assistance from a qualified professional technician.