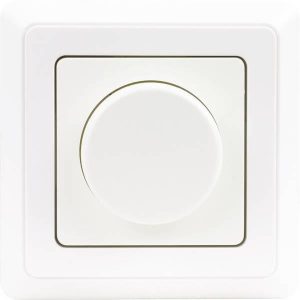
Schneider Renova WDE011626

$57.99

Description

Dimmer, Rated Current 10A, Universal Dimmer, Indoor, Led, Halogen, Incandescent, Rotating, IP 20, White

Schneider Renova WDE011626 properties

Product nameRenova WDE011626
TypeDimmer
DimmerUniversal Dimmer
Suitable for lamp typeHalogen, Incandescent, Led
Area of UseIndoor
Max Load Led40 W
Min Load Led4 W
Max Load halogen400 W
Min Load halogen4 W
Max Load Electronic transformers400 W
Min Load Electronic transformers4 W
Rotating or TouchRotating
Voltage230 V
Rated Current10.0 A
IP ClassificationIP 20
ColourWhite
Height7.1 cm
Width7.1 cm
Depth5.1 cm
Mounting depth2.9 cm

Additional information

Product name

Product type

Dimmer

Suitable for lamp type

, ,

Area of Use

Max Load Led

Min Load Led

Max Load halogen

Min Load halogen

Rotating or Touch

Voltage

Rated Current

IP Classification

Colour

Height

Width

Depth

Mounting depth

Reviews

There are no reviews yet.

Be the first to review “Schneider Renova WDE011626”

Your email address will not be published. Required fields are marked *

Frequently Asked Questions:

How do I properly install and connect the Schneider Renova WDE011626 electrical accessory?

Installing and connecting the Schneider Renova WDE011626 electrical accessory is a straightforward process that can be completed by following these steps:

1. Gather necessary tools: You will need a screwdriver, pliers, wire strippers, and wire nuts. Identify the location: Choose a suitable location for the electrical accessory, ensuring it is within reach of an electrical source. Disconnect power: Before starting any electrical work, turn off the power supply to avoid electric shock hazards. Remove cover plate: Use a screwdriver to remove the existing cover plate from your wall switch or outlet. Connect wires: Strip approximately 1 inch of insulation from the ends of the wires using wire strippers. Then, connect the corresponding wires together using wire nuts. The color-coded wires (white, black, and green) should be connected as follows:

- White wire (neutral): Connect to white wire from electrical source
- Black wire (hot): Connect to black wire from electrical source
- Green wire (ground): Connect to ground screw on the electrical accessory

6. Mount electrical accessory: Attach the Schneider Renova WDE011626 electrical accessory to the wall using mounting screws provided in the package. Ensure that it is level and securely fastened. Reconnect power: Once you have completed installation, turn the power back on and test the new accessory to ensure proper functioning. Install cover plate: Place the new cover plate over the electrical accessory and secure it in place with screws. By following these steps, you should be able to successfully install and connect your Schneider Renova WDE011626 electrical accessory without any issues. If you encounter any difficulties during the installation process, refer to the manufacturer's instructions or consult a licensed electrician for assistance.

How do I properly install and connect the Schneider Renova WDE011626 electrical accessory to my circuit?

To properly install and connect the Schneider Renova WDE011626 electrical accessory, follow these steps:

1. Ensure that power is turned off to the circuit you will be working on. This can typically be done at the circuit breaker or fuse box. Identify the appropriate location for the Schneider Renova WDE011626 electrical accessory. It should be installed near the electrical outlet or device being used, but away from any sources of water or moisture. Remove the existing cover plate or outlet box from the wall. If the WDE011626 is replacing an existing cover plate, make sure that the new mounting screws are compatible with your wall material (e. Plaster). Attach the mounting bracket provided with the WDE011626 to the wall using the included screws. Make sure that it is level and securely fastened. Connect the wires from the circuit to the corresponding terminals on the WDE011626, following the color-coding of the wires (white for neutral, black or red for hot). Use wire nuts to secure the connections and wrap each connection with electrical tape for added protection. Install the cover plate or outlet box onto the mounting bracket, ensuring that it is level and securely fastened. Turn power back on to the circuit and test the functionality of the Schneider Renova WDE011626 electrical accessory. If the accessory does not function properly or if you encounter any issues during installation, consult the manufacturer's instructions or a licensed electrician for further assistance.

How do I properly install and connect the Schneider Renova WDE011626 electrical accessory in my home's electrical system?

To properly install and connect the Schneider Renova WDE011626 electrical accessory, follow these steps:

1. Before beginning any electrical work, ensure that the power to the circuit you will be working on is turned off at the main electrical panel. Use a voltage tester to confirm that there is no electricity flowing through the wires. Gather all necessary tools and materials, including wire strippers, pliers, wire connectors, screwdrivers, and a ladder (if needed). Follow the manufacturer's instructions for mounting the accessory in its intended location. This may involve attaching it to a wall or ceiling using screws or brackets provided. Connect the wires according to the color-coding system used by Schneider Electric. Typically, white wires are connected to silver terminals, black wires to brass terminals, and green or bare copper wires to green terminals. Use wire connectors to secure the connections. Tighten all screws and terminal connections securely. Be careful not to overtighten, as this can damage the wiring or accessory. Attach any necessary covers or plates to conceal the electrical connections. These may be included with the accessory or purchased separately. Test the newly installed accessory by turning the power back on at the main electrical panel and verifying that it is functioning properly. This may involve checking for proper voltage, current, or other electrical characteristics using a multimeter or other testing equipment. Label the accessory with its intended function (such as "light switch" or "outlet") and any necessary safety information (such as maximum load capacity). This will help prevent confusion or misuse in the future. Remember, always follow all manufacturer's instructions carefully when installing electrical accessories to ensure proper operation and safety. If you are unsure about any step of the process, it may be best to consult a licensed electrician for assistance.